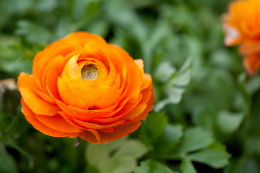
Ranunculus genus comprises around 600 species, and most of them produce vibrant-colored, layered flowers. This write-up provides instructions for planting ranunculus bulbs.

Ranunculus flowers are often used as cut flowers due to their vibrant colors and thin, delicate, paper-like petals. Their long stems make them a very attractive fit in a vase. These can be easily grown from bulbs or tubers, which have a rather unusual claw-like shape. These are usually available in the Fall. A single tuber can produce several beautiful flowers, and it contains all the nutrients that the plant requires for its growth cycle in the next season. It's a perennial plant, which is why you don't need to replant it every season.
Planting Tips
It's extremely important to provide the plant with the conditions that it requires to grow properly. These include the selection of the right planting site, the right type of soil, frequency of watering, exposure to sunlight, etc. Here are some pointers:
◘ Soil
This plant requires well-drained soil. To determine whether the soil is well-drained or not, check the soil after a few hours of rain. If you notice puddles of still water, you should look for a different site to plant the bulb.
◘ Planting
The best time to plant the tubers is late October. While planting the tuber, dig holes that are about 6 cm deep. Place each bulb in such a way that the pointed 'spiky leg' side is facing down. It should be spread 4-6 inches apart. Selecting an appropriate site is absolutely essential. So, the flower bed must be such that ample space is provided for the growth. Don't rely on the size of the bulb as the parameter for your planting site. The plant produces big flowers and you wouldn't want them to get less nutrients because of the cramped area restricting their development.
◘ Soil pH
Another option would be to go for soil testing. Create a sterilized soil medium by replenishing your soil with decomposed manure, organic material, and compost. This might elevate the level of your soil by a couple of inches and improve drainage. Maintaining a pH level of 6-6.5 is recommended for proper growth.
◘ Watering
After you finish planting, cover the bulbs well in the soil and water them. Don't go on a watering spree, go easy when it comes to watering. Keeping it moist would suffice. You could use liquid fertilizer after you have finished planting.
◘ Temperature
Ensure that the conditions are conducive to the growth of the plant. Find a place where the plant receives sunshine. Let the surroundings be cool, a 45-50 degrees Fahrenheit temperature is ideal for the night. As for the day, the temperature should be around 60 degrees Fahrenheit. The bulbs need 6-8 weeks of cool weather. This is conducive for the bulbs to sprout. You can see sprouts in the autumn. While the plant would be in the dormant state over the winter, it will begin to grow again in the spring.
Once the flowers bloom, don't be afraid to snip them. It will not affect the plant. Snipping will actually facilitate another cycle of its growth. After the blooming season is over, the yellowing of leaves will follow. The plant will enter the stage of dormancy. Remember that watering during the dormancy period must be avoided. After some months of rest, the plant will begin its growth cycle again. The growth cycle of this plant is such, that the roots begin to sprout in autumn. In the winter season, the plant starts gaining height and the flowering season starts in the spring.
You can also grow ranunculus in a pot, but make sure that you use a clay pot that allows good drainage. A 12-15 inch pot would be a good choice, if you are putting around 10 tubers. Do follow the aforementioned tips to ensure proper growth of this flowering plant.


 Ranunculus flowers are often used as cut flowers due to their vibrant colors and thin, delicate, paper-like petals. Their long stems make them a very attractive fit in a vase. These can be easily grown from bulbs or tubers, which have a rather unusual claw-like shape. These are usually available in the Fall. A single tuber can produce several beautiful flowers, and it contains all the nutrients that the plant requires for its growth cycle in the next season. It's a perennial plant, which is why you don't need to replant it every season.