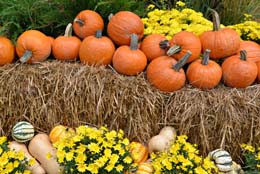
Hay bale gardening techniques involve the use of bales instead of soil to raise a garden. It is a low-cost and convenient way of growing flowers and vegetables.

Hay bale gardening is different from the traditional way of gardening. It's an excellent option for those with limited space, poor quality soil, or bad backs! Hay is basically grass, which includes leaves, long stems, and seeds that have been cut down, dried, and baled up. It has been used as cattle feed for ages. Growing vegetables in a hay bale garden is similar to the technique used to grow vegetables in a raised bed garden. Some simple tips need to be followed for this purpose, a few of which are highlighted in the paragraphs below.
Location of the Garden
A sunny spot and good water supply are two main aspects while choosing a location to grow plants in a hay bale garden. The bale must be put in the exact location you want to use, because once they are watered thoroughly, they become extremely heavy and get damaged while moving them.
Initial Preparation
One can create a garden of any shape or size. They can either be grouped in close squares or rectangles next to each other, or arranged end-to-end to create long gardens. There are different varieties of straw one can use, namely oats, wheat, rice, etc. It is recommended that bales be positioned to support one another rather than stand-alone, to increase the lifespan of the garden. Place the bales on strings that run underneath, and do not come in contact with the ground. Any hay or twine (string) on the ground will rot and deteriorate the entire bale by spreading the rot.
Hay bales are easily available in all horticulture product stores, or you could pick them up from any farmland. The ones that are fresh and not dried are called green bales. When they are watered, the microbes inside begin to digest the hay and can heat up to 150ºF before they cool down; your seedlings will be permanently damaged at 150ºF. To avoid such gardening disasters, green bales need to be seasoned before planting begins. Following is the 10-day seasoning process:
- Water the bales thoroughly twice a day for the first three days.
- From the 4th to 6th day, sprinkle half a cup of ammonium nitrate on top of each bale, and water it well.
- Follow the same procedure from the 7th to 9th day, but with only a quarter cup of ammonium nitrate a day.
- On the 10th day, sprinkle a cup of any slow releasing 10-10-10 fertilizer on each bale.
Dried bales can be directly placed, and should be thoroughly soaked in water for 5 - 6 days in order to break them down for planting. Here, 'breaking them down' means allowing the hay to release all its heat from within and cooling down. No fertilizer should be added to the dried bales during the breaking down period. All weeds should be pulled out before planting, and it should be monitored and controlled consistently, as hay has plenty of grain seeds.
Planting Preparation
The soil preparation is different for sowing seeds and planting seedlings. For seeds, a 2 - 3 inch layer of weed-free soil and compost should be placed on top of the bales. Seeds are sown in the same way as they are sown in the ground or containers. Seedlings can be directly transplanted in the straw, or one could pull apart the bale with the hand or a sharp trowel to make a hole and add some soil in it before transplanting. One can use either organic manure or liquid manure to feed the plants, once every two weeks.
Watering
Once the transplanting is complete, the bale should be watered thoroughly, and twice a day if the weather is hot. Straw or hay cannot retain water like the ground or containers. Most of the water will simply run out from the bottom of the bale. A drip irrigation system can ensure that the hay stays moist, and water is not wasted.
One can grow a whole variety of flowers, vegetables, and herbs in a hay bale garden. However, root crops don't grow well in them. One can plant, weed, and water, standing comfortably, making this technique of gardening easier on the back.


 Hay bale gardening is different from the traditional way of gardening. It's an excellent option for those with limited space, poor quality soil, or bad backs! Hay is basically grass, which includes leaves, long stems, and seeds that have been cut down, dried, and baled up. It has been used as cattle feed for ages. Growing vegetables in a hay bale garden is similar to the technique used to grow vegetables in a raised bed garden. Some simple tips need to be followed for this purpose, a few of which are highlighted in the paragraphs below.