


My New Year's resolution this year was to learn something new every month. It didn't really matter to me what that new thing would be; it just needed to be something I had been interested in doing but never got around to before. After learning to juggle and eat with chopsticks I decided to take on the mysterious art of bonsai.
When I began this project I didn't know anything about bonsai except that bonsai plants are cool looking and people seem to find bonsai relaxing. That's about it. I didn't even know how to pronounce "bonsai" correctly, as it turns out. Bonsai, pronounced like "bone-sigh," means shallow dish (bon) and plant (sai). Others will tell you that bonsai really means tree in a pot. No matter what the correct translation is, bonsai has come to be known as the art of growing plants in a container and keeping them miniaturized or dwarfed.
Bonsai is an ancient art form and since my experiences with it date back to early this year, I won't pretend to be an expert on the matter. I am smart (at least I like to think I am), but I know that absorbing 6,000 years worth of knowledge in 6 months is a little beyond my grasp. Thankfully, there are numerous resources available to you if you want to delve deeper into this beautiful and serene hobby. Bonsai enthusiasts recommend reading everything you can get your hands on, joining a local bonsai club to learn from more experienced practicioners, and utilizing the many web sites available to the modern grower. This very web site even has a forum dedicated to bonsai.
Since I can't tell you yet how you're supposed to do everything in bonsai, I simply want to share with you how I planted my first bonsai specimen and what I've done to take care of it so you can learn from my many mistakes and, hopefully, be encouraged to try it yourself. After all, if a novice like me can do it, anyone can.
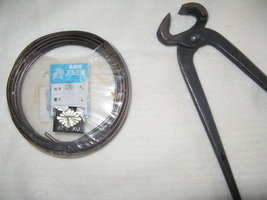
I started by buying the most basic book I could find. And yes, I looked for one that had more pictures than words. The book I selected offered helpful, demystifying explanations and easy to follow tips on how to be successful. I skimmed through it in about 15 minutes, put it down, and zoomed off to the nursery where I promptly began ignoring most of the tips I had just read, especially those "be patient" and "consider growing your own stock for a couple years" tips. Clinging instead to the fantastic images I'd seen in the book, I made a beeline for the bonsai section of the nursery. I picked out some new (but old looking) tools that I was supposed to need and some copper wiring so I could bend branches into place.
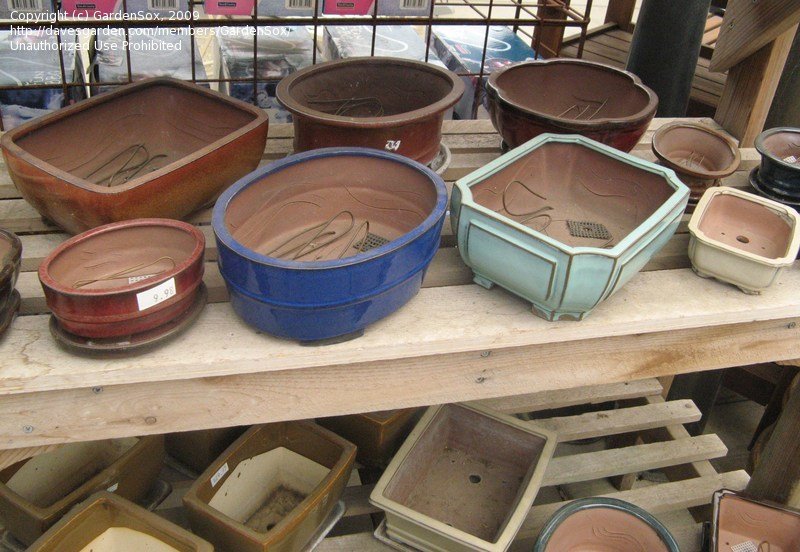
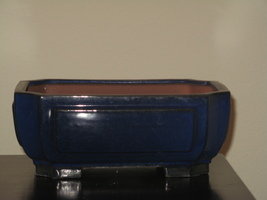
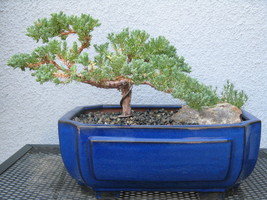
Picking out a pot was the easy part. I mean, picking out a pot is pretty foolproof, right? You just pick one you like and you're halfway finished! There are many different styles and shapes of pots to choose from. There are round pots, square pots, rectangular pots, glazed pots, and natural-looking pots. The one unifying characteristic is the relative shallowness of the pot (with one notable exception being for a cascading style bonsai which requires a tall pot). Proving to myself that nothing is foolproof, I may have made my first mistake by picking out a glossy blue pot instead of something more muted and earthy looking, something that wouldn't draw the eye away from the plant. My second mistake may have been choosing a pot that was too big for the plant I ended up with. I suppose I also cheated a little bit because I bought a pot that came pre-screened. As with all containerized plantings, drainage in bonsai is very important. Due to the shallowness of bonsai pots it is imperative that you have good screens to cover the drainage holes so that water can drain freely but still retain the little potting soil you have.
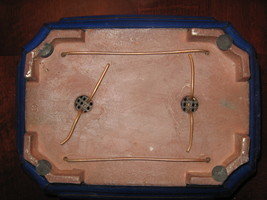
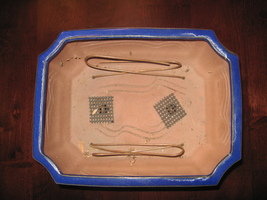
In addition to already having screens installed, the pot I purchased came with a copper wire woven up through the bottom and into the center of the pot. I surmised that this wire is meant to be wrapped around the root ball of the plant and to act as an anchor. Since this was my first foray into bonsai I felt better about my success by going this route.
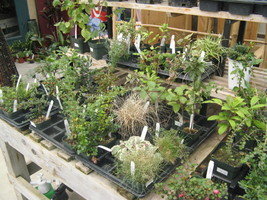
My next decision was picking out a suitable plant. There is a huge variety of plants that you can choose to grow as bonsai including Japanese maples, cotoneasters, bamboos, azaleas, ficus, elms, pines, and atlas cedars. I made my decision when I saw a plant that already had a shape to it that I found pleasing. Call it cheating again, but I didn't want to wait very long to get that "bonsai look" that others achieve through proper technique, patient training, and their own artistic vision.
In bonsai, there are five different trunk styles that the artists try to achieve. As mentioned earlier, one style is cascade and the others are semicascade, formal upright, informal upright, and slanting. I'm not sure what style this is or should be, but this Dwarf Japanese Garden Juniper reminded of larger trees I have seen. This idea of seeing nature in your bonsai is key. In bonsai, you are basically trying to create the illusion of a large landscape on small scale. To some degree, the specimen you choose will dictate the style of your bonsai planting.
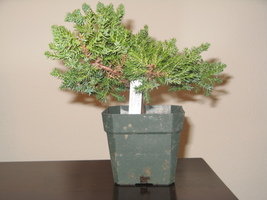
I chose to place the plant to one side of the pot and to encourage the growth to extend over the edge of the pot because it seemed more natural to me. I also wanted to highlight the off-centered, sloping nature of the growth habit. You can see in the pictures below that what I have potted already looks different than the juniper I purchased just a few months ago. I didn't fully appreciate this juniper's true shape until I had plucked away the lower foliage and revealed more of the branching. You can see in the picture (below left) that I added decorative rock to act as mulch and decoration. I wasn't happy with this look, however, so I replaced these pebbles with darker, smaller pebbles and I added a patch of Scoth Moss (below right) that will eventually form a grassy carpet and give the whole composition a more natural appearance.
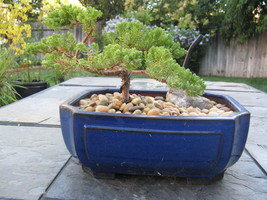
I realize that what I've created here is far from perfect, especially from a technical standpoint. However, I'm quite pleased with it in spite of the flaws that I can see and the numerous errors that the experts could point out. But what I learned in doing all this is that sometimes just trying something is more important than being successful at something. Even though I still have a lot to learn, I know so much more now than I did before I made my New Year's resolution. Over the next couple years I will work to mold my skills in bonsai just as I continue to shape my beloved new plant. I hope you will give bonsai a try someday too. And really, there's no need to wait until next year.
Copyright © www.100flowers.win Botanic Garden All Rights Reserved