


Box gardening is growing in popularity these days, so I thought I would try it this season. After reading up on it, my husband and I took the plunge. But we still longed for our good old "grunge garden" out back. So we ended up with two kinds of gardens this year. Here is our end-of-the-season report.
For years, James and I did what we thought every good gardener should do: till the ground, sift through the lumps, and plant our seeds. We did this year after year. Sometimes, in our enthusiasm, we overdid it (by planting too much) to the point of weariness. Then, by mid-August, we would give up. The weeds had won, and the garden became grungy.
Then a friend posted pictures of her Square Foot Garden boxes on Facebook two years ago. I was stunned at the beauty of it all: healthy plants, rich, weed-less soil, the smooth lines of the boxes. What impressed me the most was that her boxes were placed on her deck! She did not have to go far at all to take care of her garden! So James and I got a hold of the All New Square Foot Gardening [1] book by Mel Bartholomew and read it from cover to cover.
The principle is simple: Rather than spend a small fortune and a great deal of time amending your ground soil, why not simply start with new soil from a bag? That way, YOU control the ingredients. YOU control the weeds. YOU place those boxes wherever your little heart desires, as long as they get enough sunlight. [2] Wow.
That particular box garden soil recipe calls for peat moss, vermiculite, and blended compost, all from bags (or you may use your own compost).
Although sphagnum peat moss is easy to get, we could find neither vermiculite nor blended compost; it was not available locally. But we liked the idea of a controlled garden so much that we went ahead, substituting bagged garden soil mixed with bagged humus because our own compost was not ready. The soil we mixed was dark with large chunks. But we used it anyway.
We are substitution maniacs, die-hard DIYs (Do-It-Yourselfers), so our box frames measured 4' x 4' with old plywood full of gaps attached on the bottom. These were set on old, green outdoor carpet—what I jokingly call "Astroturf". Since we approximated both the box design and the filling, we were no longer in Square Foot Garden territory: We were on our own.
That first year, our efforts yielded little, but they DID yield something. We managed to keep some strawberryplants alive in one box, and from the remaining two boxes, we got a few squash and some bush beans.
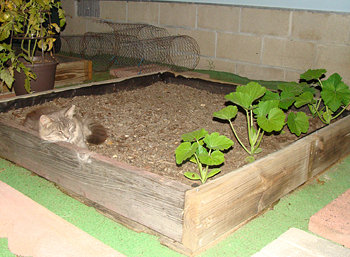 Beginner's Box Garden
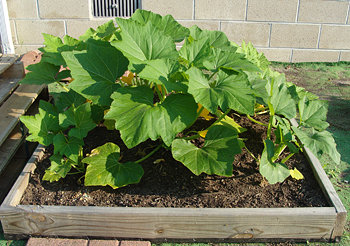 Second-year Box Garden
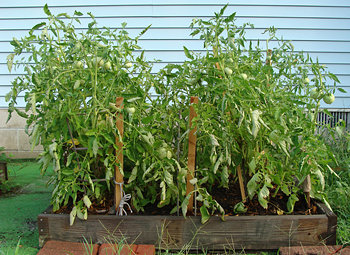 Tomatoes in Box
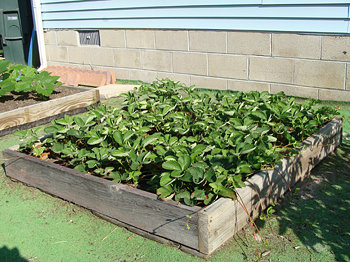 Strawberry Box
(When my nephew saw the picture, he wanted to know where he could get some "cat seeds" for his own garden.)
By the time this spring rolled around, we knew what we did wrong last year, so we attempted to set it right when we planted tomatoes and yellow summer squash in those two boxes right off our kitchen doorstep.
This year, we bought vermiculite in 8-quart bags; what a difference it made in the lightness and looseness of the soil once we mixed it all together! Although commercial garden soil in bags can be very wet, I think what saved us from vegetable rot from the beginning was the fact that we had huge gaps in the attached plywood floors of our boxes that made for excellent drainage.
We even had to watch out for drying. Plants in boxes, as in any container, are generally thirstier than plants in the ground. We began to water our boxes more frequently. Furthermore, I bought some 9-12-12 tomato and vegetable granular fertilizer and worked it in around the roots of the tomato and squash plants when we first set them into our garden boxes.
Weeds? Virtually none! An occasional spindly weed popped up here and there, but very, very infrequently.
This year, a little wiser about box gardening, I took some small wooden boxes from a grocery store that went out of business and made a soil mix (including pine bark mulch) in one of them to rescue a clump of pot-bound spearmint (as seen in the opening photo). Finally, I planted a handful of four o' clock seeds at the foot of the mint box in a smaller wooden box.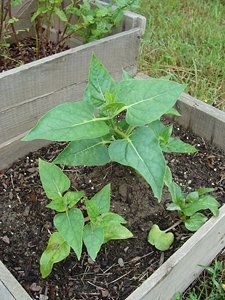 My box garden was now complete.
There is going to be a third year, and even more wisdom has been gained. This is what I will keep in mind for the future:
Tomatoes:
Tomato plants get tall, thick, and weighty. James and I will either have to make taller boxes (ours were 6" tall), or stake those puppies up in a more serious manner. As my box tomatoes grew, I would stake them with heavier sticks, eventually creating a network of wood sticks with the tomatoes tied to them in various ways. Still, the tomatoes leaned, cracked, and begged for more support than we could figure out how to supply.
Squash:
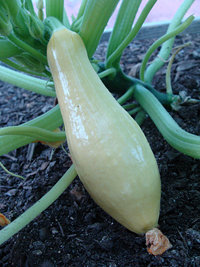
It does not take many squash plants to eventually fill a 4' by 4' garden box, even though the plants go in rather small. After three months of being so confined, the squash plants came sprawling out of the box.
Strawberries:
Strawberry plants thrive in a garden box provided they do not get dry. They need to be watched with an eagle eye, though; they can dry out rapidly. I learned to lay the garden hose right on the surface of the strawberry box soil and let it trickle for an hour or so. Our strawberry plants eventually sent runners out that rooted right through the green plastic outdoor carpet upon which our boxes sit. Still trying to figure that one out. We might just let them go and see how they make it while growing in astro-turf. 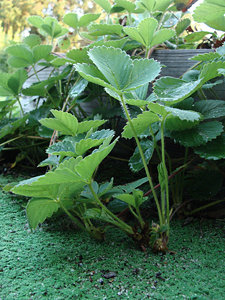
What is the Grunge Garden?
Well, as beginner box gardeners, old habits die hard. We missed our long-time grungy garden behind the house and wanted to try planting back there in addition to planting out front in our boxes this year.
So, I made two rows of bush beans out back. Then I found a few pole bean seeds and planted them; I had never tried pole beans before. 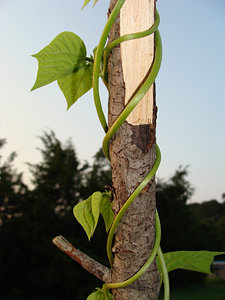
Then I set some tomato plants in a third row. Finally, I set three squash plants in. Everything that went into the grunge garden got an initial side dressing with the same 9-12-12 granular fertilizer that the box gardens got.
There was only one more thing left to do in my grunge garden ...
One June morning, feeling especially ambitious (and losing patience with my husband who promised he would till), I hand-turned a 12' by 3' strip of dirt over with a shovel and planted some Catalpa tree seeds on the outer edge of my grunge garden. I have wanted a Catalpa tree ever since I can remember, and I wasn't going to lose my window of time. Just as I finished patting a thin layer of soil on top of my precious Catalpa seeds, it began to rain softly. I took that as a blessing.
What's more, I had some Dwarf Poinciana trees growing in pots purely as an experiment, so I set those in the garden as well. They went in very close to the bush beans. I figured all the little trees would get the benefit of the garden sprinkler each time the vegetable plants were watered. My hope is that I can protect those Poincianas over the winter.
It was fun taking care of my little grunge garden. 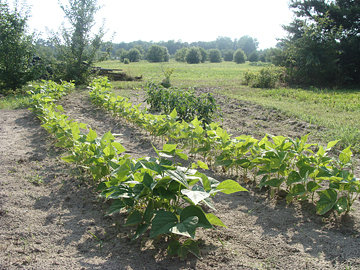 Grungy meaning dirty, unkempt, a bit grassy. Just the way I like it. Especially when barefoot.
Update—Both Gardens:
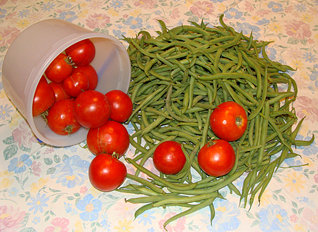
I blanched pound after pound of green bush beans all summer and now have a freezer full of frozen beans in quart-size plastic bags. Here it is, late summer into fall, and my bush beans are still making new flowers just like they did in June. The one pole bean, just like in Jack in the Beanstalk, wants to go up and up and up. It's making nice beans with no sign of stopping.
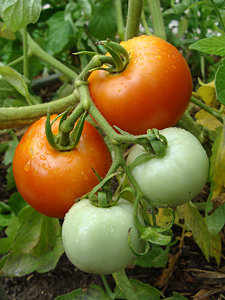 I picked more vine-ripened, plump, juicy tomatoes than I could use from both my box garden and my grunge garden. Those tomatoes are still going strong and will be stewed and roasted. The plants will keep going until frost.
I got plenty of yellow squash from both my box garden squash plants and the grunge garden plants, with both gardens still producing new blooms even as the season is turning. Hubby likes those squash steamed and especially batter-fried.
I'm keeping an eye on that strawberry box; those baby runners REALLY want to live rooted in plastic ...
My mint needed to be trimmed back after flowering. It is still making leaves which are great to pick and place in the iced tea brewer.
My four o'clocks are big and strong and may yet bloom, and when that happens, there will be another story about fall flowers that grace my yard ‘til cold weather arrives.
My little Catalpa trees, pictured on the left, are now sturdy and tough and should transplant successfully this fall. 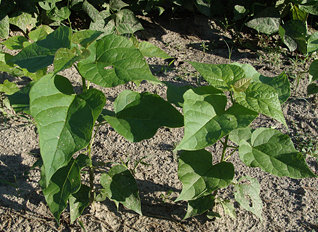
My little Poincianas, which astounded me with their growth (they were happy to get out of those plastic pots), are not so little anymore yet may need serious protection from zone 7 winter weather. 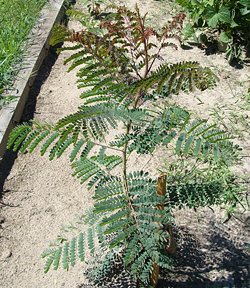 I tell my husband they are like tropical mimosa trees but with a red flower, just to give him a sense of what I have growing out there. I will get lots of exercise this coming fall as I dig up places in the yard for all my little trees. It's all good.
If you would like to experiment with garden boxes, the sky is the limit! There are many ways to garden in containers and in boxes of all types, with various recipes for soil to fill them.
Try the Self-contained Box Gardens Discussion Forum. There you will find lots of great ideas to get going or to improve what you already have. The great thing is that if you miss your traditional garden "out back", you can have your cake and eat it, too, er—You can have your mud pie and eat it, too. While box gardening is here to stay, I loved my little grunge garden and will plant both types of gardens again!
Endnotes:
[1] Mel Bartholomew, All New Square Foot Gardening, Cool Springs Press, 2006
[2] Ibid., pp. 47–48.
Helpful related links:
Self-contained Box Gardens Discussion Forum: http://davesgarden.com/community/forums/f/boxgardens/all/
Soil and Composting Discussion Forum: http://davesgarden.com/community/forums/f/soil/all/
Tomato Resource links: http://davesgarden.com/community/forums/t/579234/
<span style="fon
Copyright © www.100flowers.win Botanic Garden All Rights Reserved