


Frugal Gardeners are found world-wide and we constantly search for money-saving ways to stretch our garden budget. This Saturday feature will spotlight projects gardeners can create for inexpensive garden art and gifts. We hope our projects will inspire you to become a Frugal Gardener too!
Frugal Glass Totems and Garden Stakes
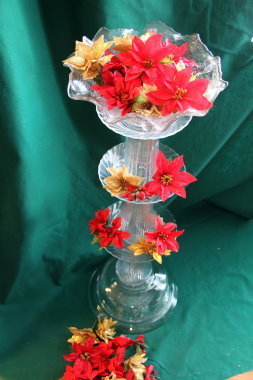 We have a great number of creative and frugal gardeners in this community, as our popular Trash to Treasure Forum attests. Members share their money-saving projects and exchange ideas. Since they are among some of the most creative and inventive minds at Dave's Garden, I asked for suggestions for this feature. Member ‘Cville_Gardener' suggested totems constructed from old glass odds and ends.
These decorative totems constructed from old florists' vases, bowls and plates look beautiful on a patio. Luck would have it while on a vacation trip to the Arkansas Ozarks, a gift shop had some smaller totems, meant for garden display for sale. My friend Judy and I were astounded at the big price tags on the pretty little pieces, many were more than $40. Some of the more expensive ones had small, decorative solar lights attached to the tops. The possibilities are endless and materials are cheap, or free. I picked up a whole box of glass items at a yard sale right down the street from the gift shop for less than $10.
This project makes for a nice holiday decoration, but frugal glass art is equally stunning on the patio or in the garden. Old pottery pieces work great too. Just be sure to protect porous ceramic from freeze and thaw situations. One-of-a-kind birdbaths and bird feeders can decorate your garden, or a selection of mini-totems placed in a window make a stunning stage for an african violet collection. A few smaller pieces could contain forced bulbs for a winter centerpiece on a dining room table or an entryway.
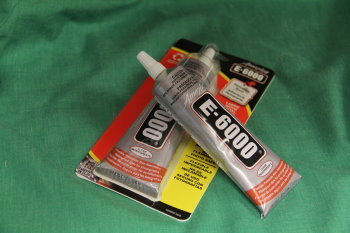
You will need a selection of various glass items and E-6000® glue. This glue permanently bonds glass, which is necessary to make a sturdy piece. Make sure your glass is squeaky clean. Any dirt, smudges or discoloration will haunt you after everything is glued together.
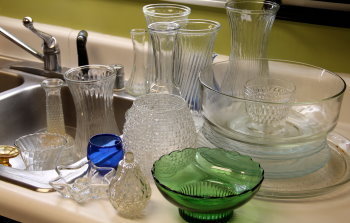
I started by thoroughly washing my glass. Make sure that the vases are completely clean. Rust rings and hard water residue will be unsightly. Add a little bleach to the discolored items and let them sit overnight if necessary. I ran some of the items through my dishwasher, which helped as well. Unfortunately, the little blue bowl wasn't blue glass and the color came off. It wasn't a huge loss since it was a ten cent item, and it is still useable; it just isn't blue anymore.
I started with some old florists' vases, odd glass plates, some old candle holders, a globe for a lamp, a mixing bowl and an old Santa platter with chips in the rims.
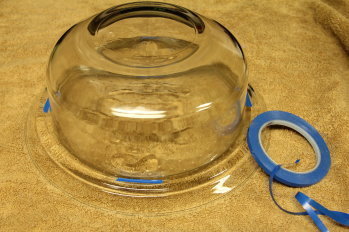
A good base is important if you're building a totem, so making sure things are centered is vital. I marked guidelines on the platter with tape, so once the glue-covered mixing bowl was lowered into place, everything would aligned properly.
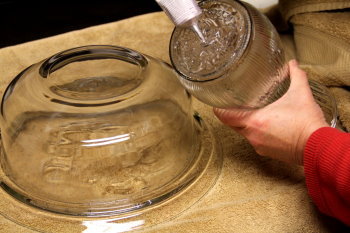
The bottoms of these florists' vases are not completely flat, so make sure you have enough glue on them to make good contact with the bowl. I kept rubbing alcohol and paper towels handy to wipe up drips and drizzles.
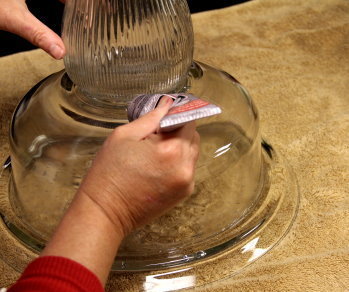
I went back and put another bead of glue around the vase once I had it in place and did the same thing for the platter/bowl union. In this case, more is better, you don't want the whole thing to come crashing down.
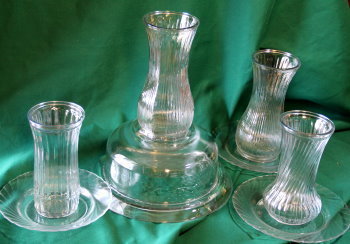
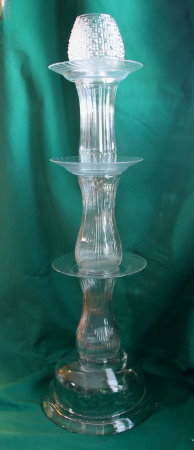 Since this was such a big undertaking, I decided to do this in a series of steps. Once I decided on where each piece would go, by carefully stacking the various pieces until I had a pleasing combination, I glued the plates to the vases and let them sit overnight. Make sure you center your vases on the plates. Your totem will lean if you don't and makes for an unstable piece.
The plates with vases attached were much easier to handle and I felt more confident in stacking them several tiers high. As you construct your tower, check for wayward debris that may have found its way into the vases before you glue them together. Seeing a little spider entombed after the fact wouldn't be fun for you, or the spider. Again, check for good contact between the various pieces and be generous with your glue. This glue does produce fumes, so use a well-ventilated area.The totem on the right is complete, but I didn't glue the top piece to the last plate.This gives me some options when decorating.
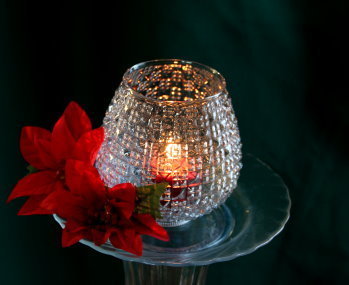
I really liked the little lamp globe and it looked like it would make a great candle holder, but I didn't want it to be my only choice. It is simply placed on the plate and the candle fits inside perfectly. Be sure to use another container inside of a lamp shade since there is also a hole in the bottom. I placed my candle in a cut glass voitive holder to prevent unwanted wax drips.
When considering potential candle holders, check to make sure the bottoms are stable and sturdy. Candles and wobbles do not play well together. Place your totem away from potential fire hazards such as curtains or Christmas Trees. This same totem would be quite lovely draped in a string of lights and placed on a patio or near your front entrance.
The tall totem would look fantastic on a summer party table with a cascading plant on top. A huge basket of Wave petunias or Boston fern crowning the totem for a bridal shower, or anniversay party would be a showstopper.
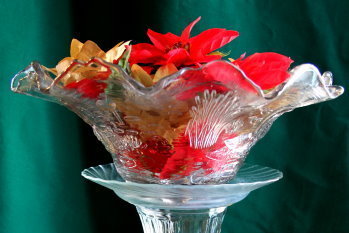
This is what I actually had in mind when I created the totem. The bowl is an antique, handed down to me by a family member. I could see the completed totem topped with my cherished heirloom, which is why I was extra careful when constructing it!
When I was discussing this potential project with 'Cville_Gardener', I told her I had something very special for the top of my totem that she was going to love, and here it is!
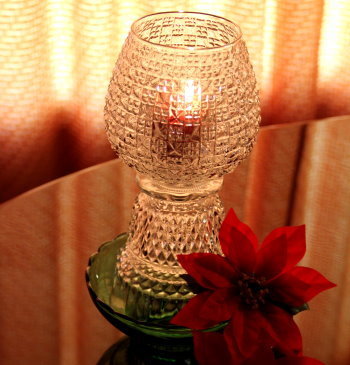
The little lamp shade looks nice with some more cut class and a green bowl. I'll probably display it on the buffet in my dining room during the holidays.
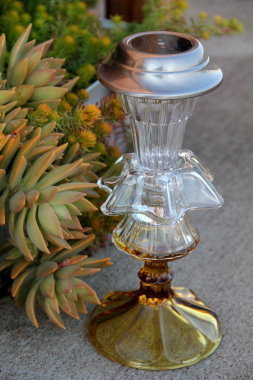
A few odd candle holders and a cheap solar light make a cute mini-totem, perfect for tucking in a group of containers or strategically placed by the back door, or in a flower bed.
These frugal pieces of art are easy to make and quite attractive. You may have a collection of nostalgic items that aren't exactly 'china cabinet worthy', but still mean something to you. Think of using the florists' vases from anniversary or birthday flowers to construct a piece of art for your patio or garden. Old bud vases and interesting yard sale finds, sit atop stakes in your perennial bed. The possibilities are endless and you are only limited by the amount of junk you have.
Here are links to previous Frugal Gardener articles August & September. Stay tuned for future installments of the Frugal Gardener and let us know if you have ideas that may be of interest to other members!
Copyright © www.100flowers.win Botanic Garden All Rights Reserved