

How to water, when to water, how much to water? Watering might be the most discussed topic in African violet care. While there is no ?one true way,? a look at several common techniques might help you figure out how to keep your African violets happier and healthier.
With any watering method, keep in mind that African violets hate "wet feet." Letting the soil go dry for a few days every so often will help keep the roots healthy. Too much water and too little water can produce the same symptoms - a wilted looking plant with drooping leaves. Until you figure out what works for your plants, you'll want to pay close attention to moisture levels.Top Watering is what we're most familiar with, when we water our houseplants. African violets don't mind being watered from the top. Contrary to popular advice, they also don't mind getting their leaves wet. Leaves that stay wet, however, are another story. Water sitting on leaves can cause spots from sun or cold damage. Wet crowns can lead to rot. If they do get wet, blot the water from the leaves and crown with a paper towel. Condiment style squirt bottles can help you water without wetting the leaves.
Bottom Watering simply means watering the pot from the bottom. The potting mix soaks up moisture through the drainage holes in the bottom of the pot. This method waters the roots and keeps the foliage dry and happy. The surface of the potting mix also stays on the dry side, discouraging fungus gnats, algae and mold.
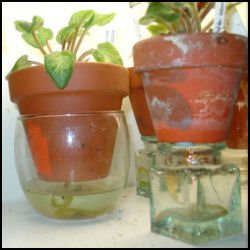
 Wick Watering is a method using a wick to draw water up into the potting mix from a reservoir. Mason twine and strips of old pantyhose make excellent wicks. Put the wick up inside the pot, so it makes good contact with the potting mix and then extends through the drainage hole and into the water reservoir. Many different containers can work as reservoirs. You can also create a communal reservoir by putting a plastic grid over a sturdy nursery tray. The pots sit on the grid, and their wicks go down into the water.
Capillary Mats go directly under pots. The drainage holes in the pot provide contact between the potting mix and the mat. When the mat is wet, capillary action carries moisture from the mat up into the potting mix. You can buy special material and cut it to fit your tray or saucer. Or you can cut up an acrylic blanket. Natural fibers generally break down too quickly to be practical. The mat can simply be placed on the bottom of a tray, under the pots. After bottom watering, the mat will absorb extra water and make it available to the plants over the next several days. Alternately, the mat can be used to wick water from a communal reservoir. Place the mat on a grid, set over a sturdy nursery tray. Let one end of the mat extend down into a reservoir of water in the tray, to keep the mat moist.
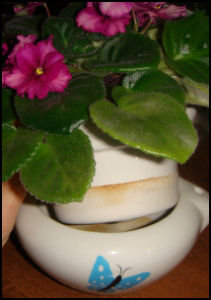
 Self-watering Pots are the two-piece ceramic planters often sold as "African violet pots." The unglazed inner pot absorbs moisture from the reservoir of water in the outer pot. Many AV varieties love growing in these pots, but I've had a few that just sulked until moved back to a regular plastic pot. It's especially important to use a light soil mixture (at least half perlite) in these pots to keep the roots from getting too wet. Filling the reservoir only partway so just the bottom quarter inch or so of the inner pot gets wet will also help keep it from getting waterlogged.
The Texas-style Potting Method uses a layer of fine gravel or perlite at the bottom of the pot to wick water up from a saucer or tray. The commercial two piece plastic pots called Oyama Planters are a self-watering option utilizing a similar concept.
Tricks and Tips
The constant moisture of many of these methods make it especially important to use a light potting mix. I use a little more than 1 part perlite to 1 part good quality soil-less potting mix. A bit of activated charcoal in the bottom of the pot can also help keep wet soil from getting funky.
Constant-watering methods save time and are especially useful if you're often away. Give your plants a break from constantly moist conditions every month or two by emptying reservoirs and letting potting mix dry out for about a week. Since dried potting mix may pull away from a wick or from the sides of a self-watering pot, a little top watering might be necessary to restart the action.
 Using community trays with capillary mats or wicked pots lets you spend less time watering. If you have a large collection or are doing a lot of propagating, this can be a big time saver. Community watering does carry more risk of spreading pests and diseases between plants, so there's a trade-off. You may see green algae growing in your reservoir trays or on your capillary mats. It's usually harmless, but if you don't like the way it looks you can add a control product like PhysanTM to the water.
Experiment with different watering styles and techniques until you find one that suits you and your plants. With any method, watering from the top with plain water every so often will help flush excess fertilizer salts from the soil.
Remember that a waterlogged African violet with root rot will look just like a wilted, too-dry African violet. So stick your finger in the potting mix to test for moisture before pouring on more water to "rescue" a drooping plant.
Having so many possibilities to choose from can seem complicated, but it gives you a lot of flexibility. Having more than one "right" answer to "How should I water my African violet?" lets you find the answer that works best for you!
For more information on African violets, drop by the friendly African Violets and Gesneriads Forum here on DG. For an introduction to growing African Violets, see African Violets 101: Caring for Your New Plant.
Photos by Jill M. Nicolaus.
Copyright © www.100flowers.win Botanic Garden All Rights Reserved