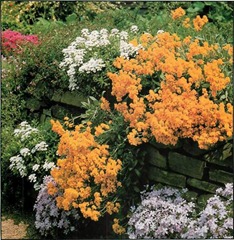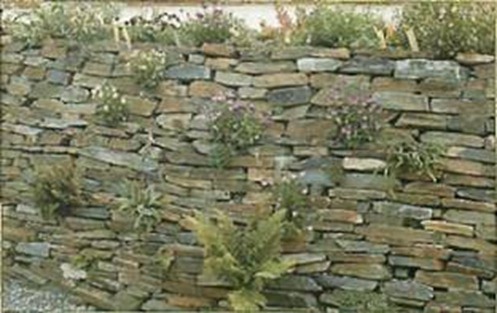


If you lack the space for a formal rock garden, but long for a display of alpine plants and flowers, a dry stone wall is the ideal solution. The combination of natural stone and colourful mountain flowers brings out the best of both.
The first dry stone walls were probably created as farmers clearing fields piled rocks and gravel on the borders of their land. These walls proved perfect habitats for alpine plants, and rock gardeners noticed that this combination of beauty and utility could be re-created in the garden.
 Building a dry stone wall is a fairly simple way of making a dramatic improvement to the look of your garden. As a retaining wall, it will have much more impact than a characterless concrete structure.
The right location for a dry stone wall depends on the size and shape of your garden. Anywhere that a retaining wall is needed — in front of a bank or along a drive — is perfect. You can also make a free-standing dry stone wall, but this takes up a lot more space.
TIP
CROWNING GLORY
Flowers and shrubs planted on the top of the dry stone wall should be compact, with shallow roots. This helps to limit competition with other plants lower in the wall. Saxifrages and androsaces are ideal plants for this position.
If you live in or near the countryside, try to get in touch with local farmers to see if they will let you take as many rocks as you need from their land. Remember that you must always ask their permission first.
If this does not prove successful, or if you live in a city, check with stonemasons and quarries in your area. Both may have discards that they will let you take away.
The best rocks for building a dry stone wall have a flattened shape. They should also be small and light enough for one person to lift without too much effort. Sandstone or limestone are rocks traditionally used to build dry stone walls, but shale is also suitable.
If you use limestone for your wall, be sure to choose plants that tolerate lime. Plants that are lime intolerant, such as summer-flowering heath, are not suited to limestone walls.
IMPORTANT
All dry stone walls need to be broader at the bottom than the top to give them stability. The size of this slope varies according to the finished height of the wall. Low walls should slope back at least 30cm for every 1.5m of rise; high walls need to slope back roughly 50cm for every 1.5m.
POPULAR VARIETIES
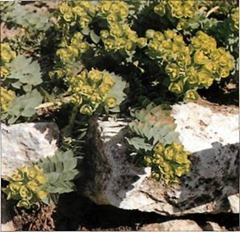
Flowers: alpine aster, alpine campanulas, alpine spurges (Euphorbia), alyssum, aubretia, creeping baby’s breath (Gypsophila repens), houseleek (Sempervivum), moss pink (Phlox subulata), phlox, stonecrop (Sedum), thyme.
Shrubs: clematis, dryas, santolina, spiraea.
Shade-loving shrubs: bergenia, yellow corydalis (Corydalis lutea), saxifrage.

Before you start to build the wall, prepare a mixture of topsoil, compost, coarse sand and fine gravel. Have the alpine plants you have chosen ready when you begin construction, so that they are to hand for inserting in the crevices as you build the wall layer by layer.
TIP
LEARNING SKILLS
Dry stone walling is a traditional craft that is still practised by specialists in many parts of Britain. If you are not confident of your ability to build a dry stone wall in your garden, or would like to improve your skills, contact a local conservation group. Many such groups run courses in building dry stone walls in the countryside. Although the method does not include planting up the wall, the basic techniques used are similar.
Building and planting a dry stone wall
• Mark out the construction area. For a retaining wall, cut the slope back to a vertical section the same height that you want the finished wall to be.
• Make the area at the bottom of the wall wider than the top, so that the wall can slope back for stability.
• Dig the foundation area 15-45cm deep, depending on the height of the finished wall. Partly fill with coarse gravel for good drainage and begin laying the stones. Each layer is called a course. Make each course slightly smaller than the one below to create the necessary inward slope.
• Fill crevices with prepared soil and cover the top of the course with soil, packing it firmly. The soil is essential to the wall’s stability.

• Working carefully, spread the roots of plants out and cover with 1cm of soil. Do not fill every crevice, as the plants soon spread. Continue this process until the wall is complete. Make sure that each stone rests firmly and solidly on the course below.
Copyright © www.100flowers.win Botanic Garden All Rights Reserved