


Gardening in wet conditions has its drawbacks, but it does offer great possibilities for interesting easy-care gardens. Consider, for example, the wilds of the Mississippi Delta in spring. There you can see one of nature's more spectacular shows -- millions of Louisiana irises, perhaps the only plant in the world that naturally bears flowers in every color. Reds, blues, yellows, and every possible combination on the color wheel turn the boggy lowlands into a dazzling kaleidoscope. Such a glorious scene is possible only because of the near-swamp conditions.
If you have extremely wet areas on your property, try to turn this condition into an advantage. However, first determine how large an area gets too wet and to what degree -- or how often this area remains wet. Understanding these factors will allow you to design a garden that will thrive with a minimum of labor. You can either improve the growing conditions or choose plants that like plenty of moisture.
Find out how to use a rain garden to manage water runoff.
If your wet area is a relatively small one, you might elect to eliminate it rather than to accommodate it. If the drainage problem is not too severe, you can lighten the soil by working in lots of organic matter, or you can build raised beds on top of the wet ground; fill them with a fertile, well-drained soil mix; and plant in them.
Add a dry stream bed to redirect moisture in your yard.
A more labor-intensive solution to altering a site with poor drainage is to excavate the soil and install underground drainage tiles or plastic pipes.
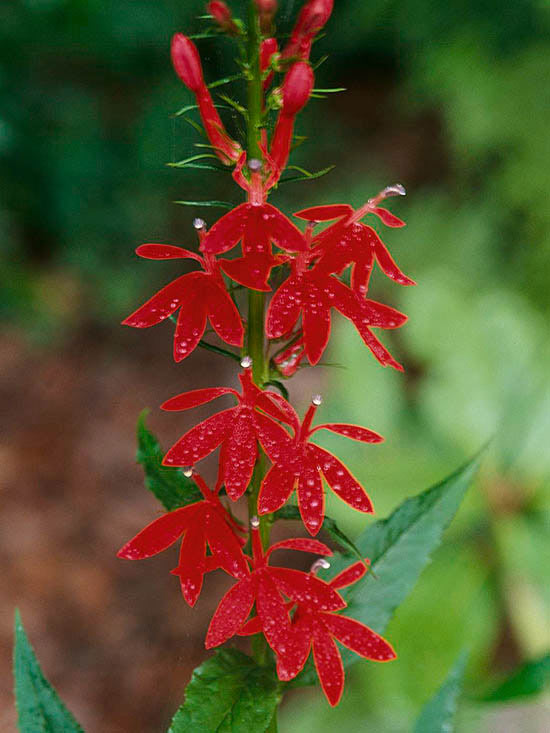
If your area is too large to alter or is not amenable to change (a riverbank, for example), you have several alternatives. The simplest approach is to choose water-loving plants, such as marsh marigold (Caltha palustris) or cardinal flower (Lobelia cardinalis), and if necessary, to construct raised paths or boardwalks through the garden so that you can enjoy the garden from a drier viewpoint.
Learn about other plants that like wet soil.
Another, more elaborate solution is to create a pond, bog, or water garden in your wet area. This will probably require some professional help: the land will have to be carefully sculpted in order to maintain a continuous supply of water to the area. The added bonus of having a small pond on your property is that wildlife naturally gravitates toward wet areas as drinking places. Numerous birds, such as grackles, mocking birds, catbirds, cardinals, and nuthatches will seek out your wet garden. Another approach to working with an existing wet area is to put in a catch basin, carefully concealed behind a bank of shrubs, to store water runoff.
When determining the degree and extent of wet conditions on your property, you may find that selected areas are wet some but not all of the time. Northern gardeners with contoured properties often experience this scenario.
One example of how periodic wetness can occur is when freezing temperatures lock moisture in the soil during the winter and then, with the warmth of spring, release a steady stream to the lower ground, which remains frozen. While the spring thaw creates boglike conditions for only a short time, it can nevertheless drown the roots of many plants. If these conditions exist in your garden, choose moisture-loving plants and make sure there is a way to keep the area damp during any summer dry spells.
In other instances, your garden areas may be excessively wet only after heavy rains. In these cases you clearly need to improve drainage. Or you could consider building a ledge or digging trenches to deflect runoff water away from the garden.
Finally, there may be some areas on your property that are consistently damp. From a low-maintenance point of view, these are the easiest wet conditions to tackle; just put in lots of moisture-loving plants and turn the area into a bog garden.
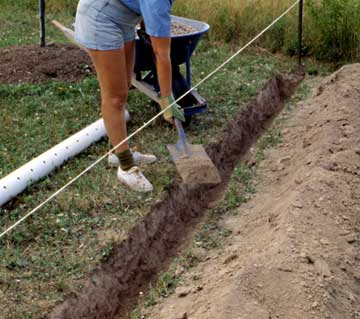 Step 1.
1. Dig a trench. To improve poor drainage, install underground pipes or tiles. Dig a trench from the garden to the desired drainage area.
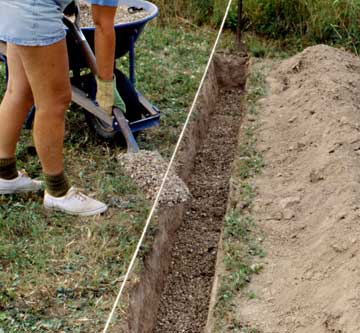 Step 2.
2. Spread gravel. The trench should be deep enough for the pipe to lie below the frost line. Spread a few inches of gravel in the bottom and rake smooth.
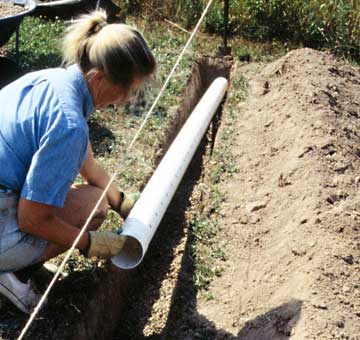 Step 3.
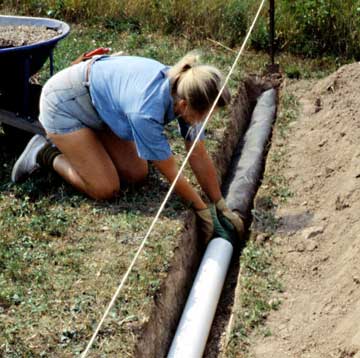
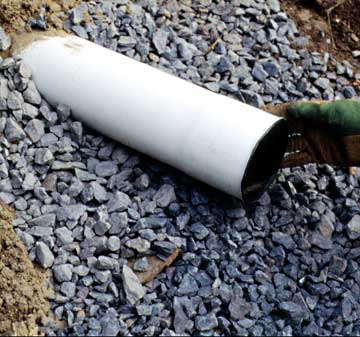
3. Place the pipe. After raking the gravel smooth, lay PVC drainage pipe on the gravel, with the holes facing downward.
 Step 4.
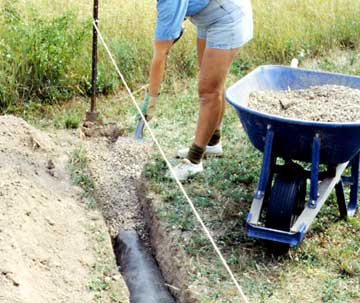
4. Cover, seal and protect pipe. Cover the entire drainage pipe with roofing paper in order to seal the joints and protect the pipe from damage.
 Step 5.
5. Fill the surface level. Add 2 or 3 inches more gravel to cover the sealed pipe, then fill up to the surface level with topsoil.
 Step 6.
6. Camoflage outlet. At the pipe's outlet cover the drainage field with stones or with a moisture-loving groundcover, without blocking the pipe.
Copyright © www.100flowers.win Botanic Garden All Rights Reserved