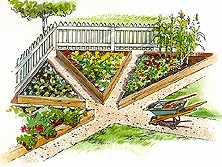


Raised beds are an attractive and practical solution for small yards. They tame a rampant vegetable garden by creating neat compartments that are easy to weed, water, and mulch.
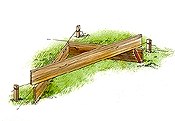
continue reading belowChoose pressure-treated cedar, or redwood 2x10s. (If you choose pressure-treated lumber, be sure to wear a dust mask and eye protection while sawing.) Roughly grade the area for the garden so it is level. Use stakes and string to lay out each raised bed, making sure that the strings are 12 inches above the ground. Comfortable paths are at least 24 inches wide. (If you plan to have grass paths, set beds to make a path at least 3 inches wider than your lawn mower.) In addition to basic carpentry tools, you'll need a baby sledge, a rachet and sockets, and large C-clamps.

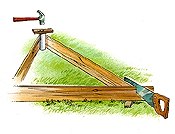
1. Using the layout strings as a guide, cut the 2x10s roughly to length. With 3-inch deck screws, fasten the two pieces that form a 90-degree angle. Set the piece that forms the hypotenuse on top of the pieces and mark it for the angled cut.

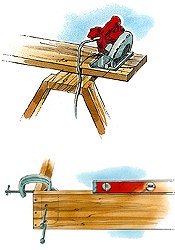
2. Set your circular saw blade so it matches the angled mark on the hypotenuse piece. Mark a perpendicular cutting line and cut the piece to size. Drill pilot holes and fasten the piece in place using 3-inch galvanized deck screws.

3. Set the enclosure on scraps of 2x4 and trim the excess 2x10 with a coarse-cut handsaw. Position the unit on the ground and pound 2-foot sections of 3-inch PVC pipe into each corner. If you are working with a large garden, install a pipe every 6 feet to keep the enclosure from bowing.
4. Level the 2x10 frame, laying scraps of lumber and builder's shim to bring it to the desired height. Holding the frame to the pipe with a C-clamp, drill two 5/16-inch holes through the 2x10 and PVC pipe. Insert two 1/4x5-inch carriage bolts at each stake, add a washer and nut, and tighten in place. Fill the pipes with gravel and top them off with mortar mix.
Copyright © www.100flowers.win Botanic Garden All Rights Reserved