


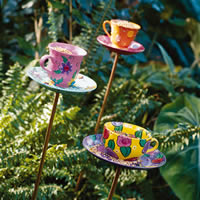
 Whimsical cup-and-saucer
bird feeders with exuberant
painted designs enliven the
garden and serve as feeding
stations for freewheeling birds.
Cup-and-saucer patterns
Download Adobe Acrobat
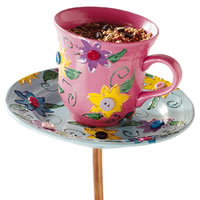
1. Download the free patterns for this project. (Downloading requires Adobe Acrobat.)
2. Prepare the cup and saucer. Using the ruler and the marking pen, measure and mark the center of the cup and saucer. Carefully drill a hole in the center of both pieces. Sand the surfaces of the cup and saucer to roughen the finish, and wipe or wash off all the dust (this will help the paint adhere). Using the 1/2-inch flat brush, base-coat each piece with acrylic paint; let the paint dry. Repeat with a second coat, if necessary.
3. Paint the designs. Rose and Swirl: Using the patterns and the photographs as a guide, paint free-form shapes in the colors of your choice with the 1/2-inch flat brush. Add details or outline each flower with a contrasting color and the #0 liner brush. Paint the leaves as above; let the paint dry. Spray all surfaces with two coats of clear spray finish. Button Flower: Cut a flower shape from a flat kitchen sponge to make repetitive flower shapes. Wet the sponge and squeeze it dry; and then brush one surface with paint. Press the sponge onto the base-coated surfaces of the cup and saucer to create the design. Add outlines and details with the #0 liner brush; let the paint dry. Paint the leaves as above.
4. Glue buttons to the centers of the flowers. Spray all surfaces with two coats of polyurethane clear finish.
Make a pretty painted birdhouse to attract more winged visitors.
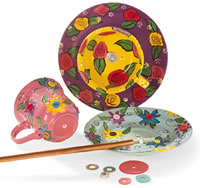
5. Assemble the bird feeder. Note: Make spacers by cutting circles from crafts foam and punching holes in the center (see photo). See the Assembly Diagram on the pattern for the order in which to add the individual parts. Insert the threaded metal rod through the copper tubing. Place a nut at one end of the metal rod but do not tighten it until all pieces are assembled. At the other end of the rod, place a nut and a washer, then a foam spacer. Next, place the drilled saucer, then a large circle of crafts foam cut to the same diameter as the bottom of the cup. Place the teacup on the threaded rod, then a foam spacer, a metal washer, and finally, the metal nut. Carefully tighten the nuts on the end to create a firm fit. Push the rod into the soil and fill the teacup with birdseed.
Add a bee to your bird feeder for an extra touch. The glass-bead body and head and the wings made from screen wire are weatherproof for outdoor use, but you'll probably want to make extras to stick into houseplant pots or use as whimsical napkin rings or lamp finials.
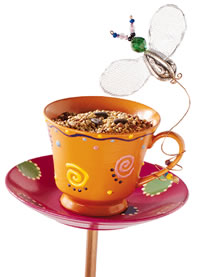 A flighty bumblebee makes a
novel trimming for this
whimsical bird feeder.
Bee wing pattern
Download Adobe Acrobat
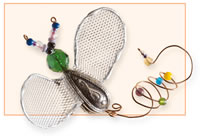 You also can embellish other
garden and home projects
with this playful bee.
1. Download the free pattern for this project. (Downloading requires Adobe Acrobat.)
2. Cut two 3-inch-long pieces of wire, reserving the remainder. Thread both pieces through the two large beads to make a body and head; separate the wires, adding small beads for the antennae, and then curl all four ends with the needle-nose pliers.
3. Using the pattern, cut two wings from aluminum screen wire. Outline the curve of each wing with silver fabric paint to form raised edges; let dry. Bend the cut edges of the wings 1/8-inch toward the underside and glue them to the body.
4. Thread small beads onto the remaining wire, curl one end, coil the wire around a pencil to make a spiral, and insert the other end into the body; glue it in place.
Copyright © www.100flowers.win Botanic Garden All Rights Reserved