Julie Kim
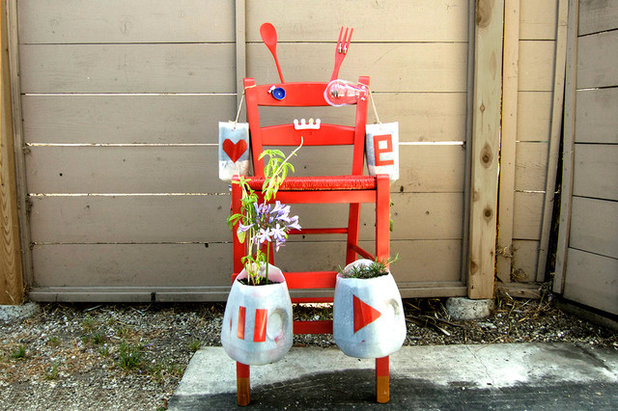
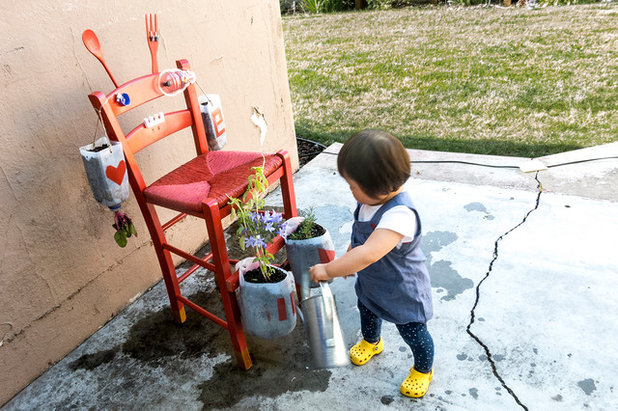
My 17-month-old toddler has an obsession with playing outside. We have a backyard with a small lawn, and I have always toyed with the idea of introducing a more permanent play structure for her, along with raised garden beds for me, but, alas, these projects always get put off until “tomorrow.” So I decided to build a fun garden station that looks like a robot. She gets to play outside and learn about gardening, and I get a small semblance of a vegetable garden.
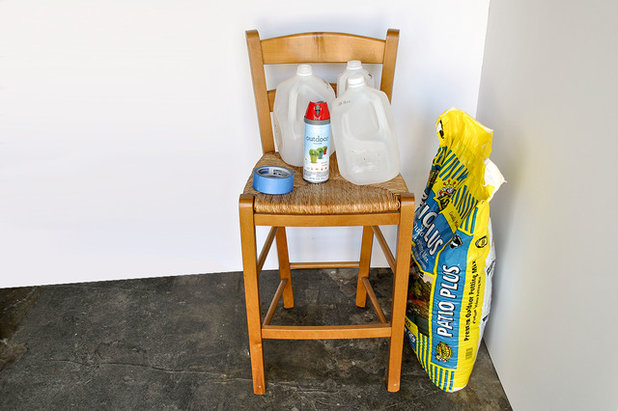
How to Make Your OwnI tried to reuse the materials collecting dust in the dark corners of my garage. I used an Ikea chair (you can use any old chair) and old milk jugs. Depending on what you have lying around the house, this could cost you nothing. I spent about $8 on spray paint and primer.
As you can see, the robot makes a lively addition to a small yard, balcony or patio. It has a compact size and is mobile, allowing you to play with the location to find the best growing conditions for plants. And the scale is just right for curious kids.
Julie Kim
Materials and tools:- Old wooden chair (a solid wood chair is more durable for the outdoors than MDF or particleboard)
- Scrap piece of wood the same length as the front width of your chair (to hold the lower milk jugs in place)
- 2 gallon-size milk jugs, caps not needed (for the lower planters, or the legs of the robot)
- 2 half-gallon milk jugs, caps not needed (for the upside-down hanging planters, or the arms of the robot)
- Potting soil
- Exterior-grade paint or spray paint and primer for chair (primer is optional but recommended)
- Sharpie marker
- Painter’s tape
- Newspaper or cone-style coffee filters
- Jute cord (for hanging the upside-down planters)
- Screws and nails
- Knickknacks to create facial features for the robot
- Plants
- Electric drill
- Blade and/or scissors
- Hole puncher

Julie Kim
Paint your chair with an exterior paint, following the manufacturer’s instructions. Using a primer is recommended to help with durability outdoors.
Julie Kim
Rinse your milk jugs clean with dish soap and water; remove the label and dry the jug. (You don’t need the caps, but you can save them to create your robot’s eyes.)
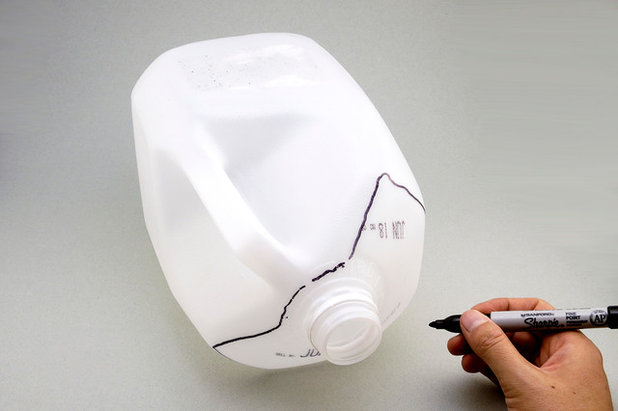
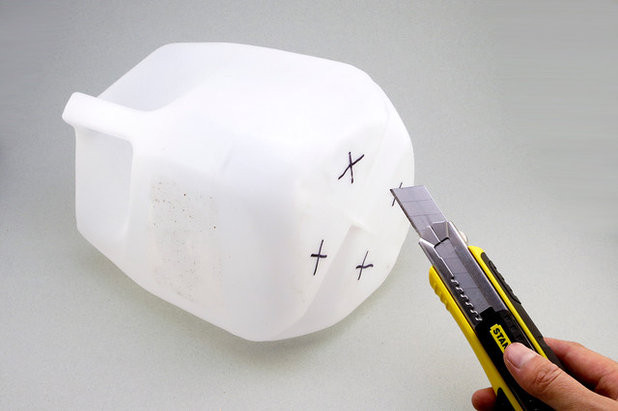
Open up your milk jugs to create the planters. For the gallon jugs, use a Sharpie to mark roughly where you see in the photograph — keep the handle intact so you can use it to hang the planter off the chair. Then cut the tops of the jugs off.
Julie Kim
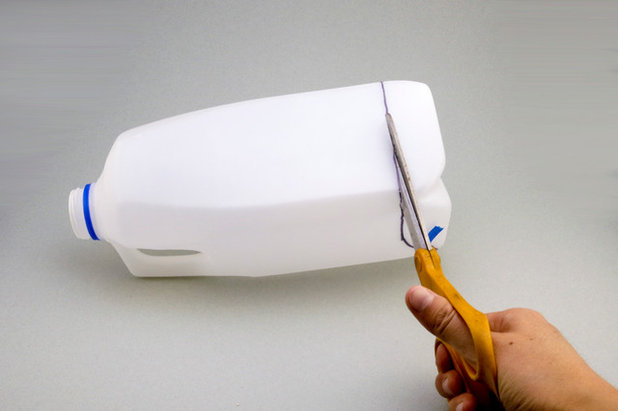
For the half-gallon jugs, use a Sharpie to mark a line about 1¼ inches from the bottom. Then use a blade or scissors to puncture the jug and cut the bottom portion off just the half-gallon jugs.
Julie Kim
For the gallon jugs, mark four Xs with the Sharpie and then cut slits on them with a blade. These slits will provide drainage holes for your planters.
Julie Kim
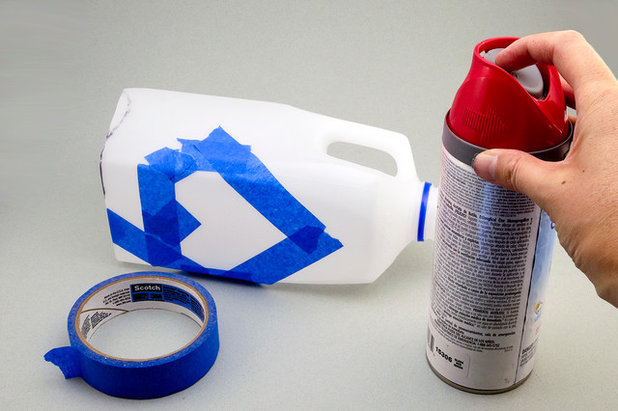
Add fun graphics to the jugs by using painter’s tape to create stencils.
Julie Kim
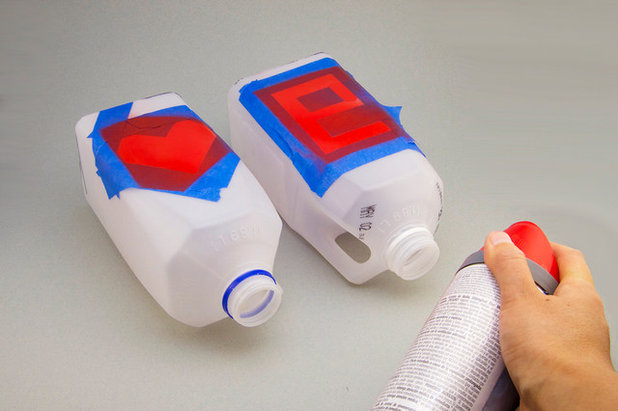
Paint the stencils and allow the paint to dry completely before removing the tape.
Julie Kim
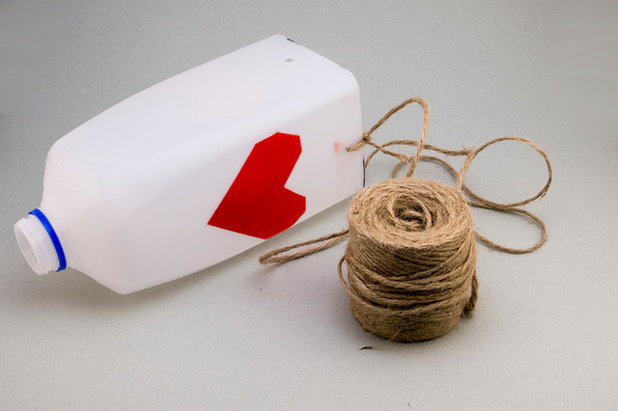
Create the robot’s arms by punching holes in the front and back of the smaller jugs about a half-inch below the opening. Feed the jute cord through the holes. Find an appropriate length by placing the jug next to your chair, then tie a knot in the cord. It’s better to start off too long than too short so you can cut if needed.
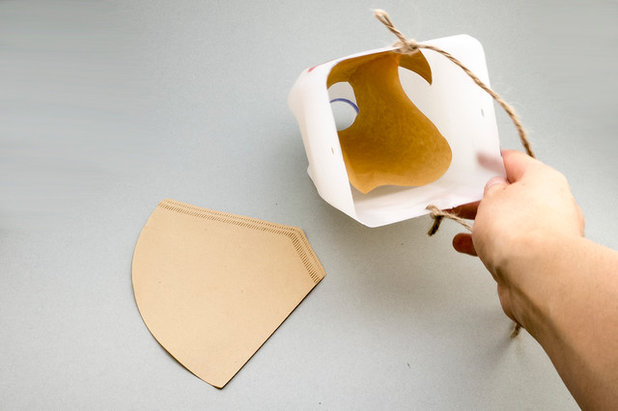
Julie Kim
Snip off the bottoms of two coffee filters and slip one each into the smaller jugs to help hold the plants and dirt in place. You can also use any other thin, porous paper, like newspaper.
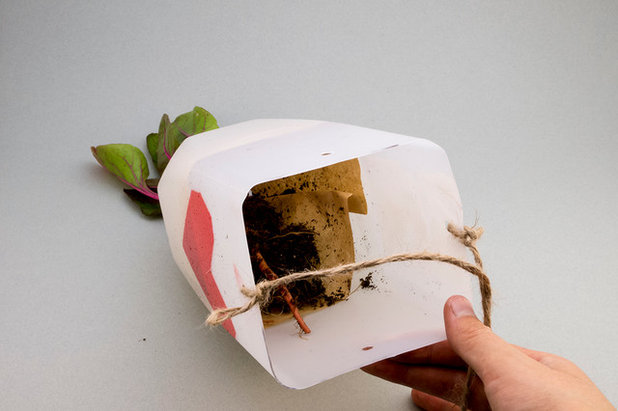
Julie Kim
Place one plant upside down in each hanging planter. You can research ideal plants to grow upside down, but experts recommend any vegetable plant that grows along a vine. Cherry tomatoes are a safe bet for beginners.
See how to grow tomatoes | See more on edible gardens
Julie Kim
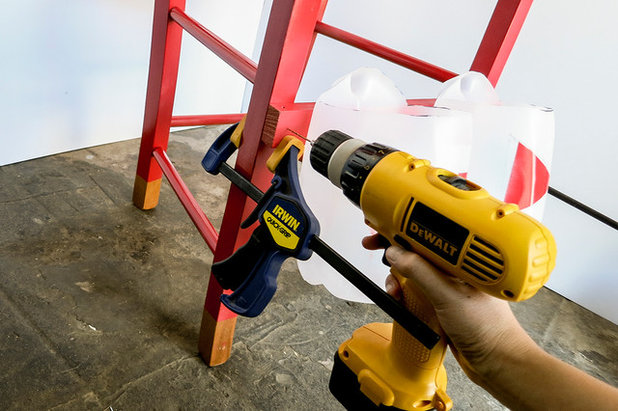
Create the robot legs by first trimming a scrap piece of wood the same width as the front of your chair. (Optional step: Spray paint it the same color as the chair so it blends in.)
Now loop the wood piece through the gallon-jug handles and screw the wood piece into the chair at a height appropriate for your child.
Julie Kim
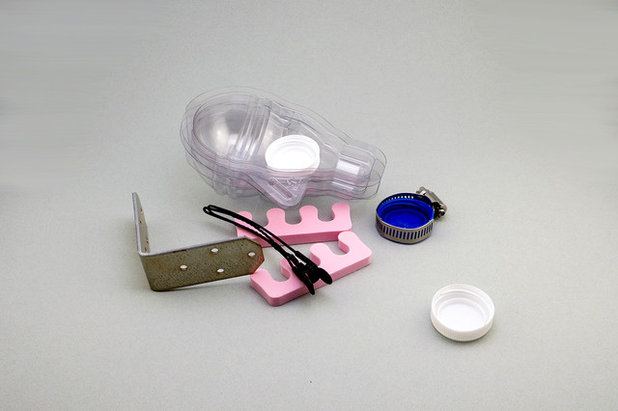
Use available knickknacks to form the robot’s facial features. I used a combination of screws and nails to fasten the pieces to the chair’s back.
Julie Kim
Enjoy your robot garden! Its vertical, compact design makes it perfect for a patio or balcony. But your kid will enjoy it the most.
More:How to Plant a Fairy Garden
See more DIY projects


