


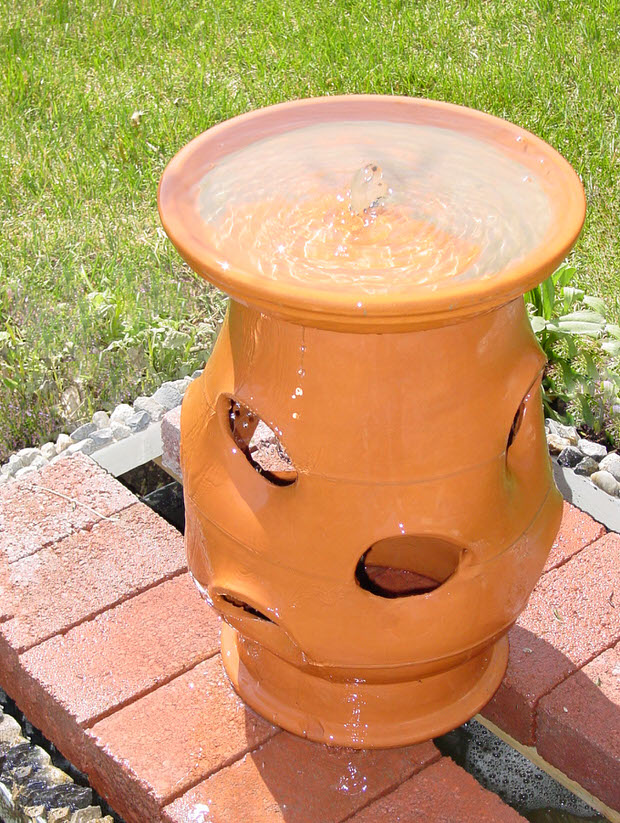
When I first considered putting a water feature into my garden, I was intimidated. It seemed like a daunting task best left to people with a lot of money to pay for professional installation. Nothing could be further from the truth, and a water fountain is a great way to ease into using water in the landscape without the expense and work of a pond or waterfall.
I created a water fountain out of materials I had around the house, picked up a fountain pump and some tubing, and got creative! Here is how my fountain was created. You can see step by step and finished photos below.
Materials needed
Large pot and saucer
Outdoor fountain pump, small
Tubing to fit your pump
Drill and ceramic bit
Large plastic bin or fountain kit basin (Rubbermaid round containers work great)
1×2 lumber
Bricks and stones
Silicone caulk
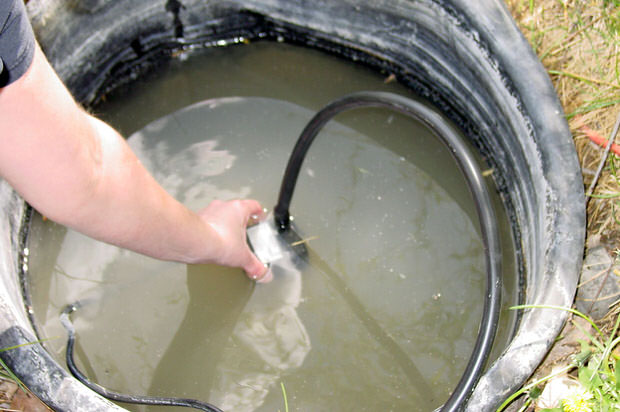
First you need to determine the best place for your inground fountain. I chose a sliver of lawn next to the patio so we could enjoy the sound, but an area that could be seen from my kitchen and dining room windows. Dig a hole slightly larger than the plastic bin or fountain kit basin. Use a level to try to keep the bottom of the hole as level as possible. Make sure the bottom is packed down tightly, place bin in hole and fill halfway with water.
Build a frame as a base over the basin to hold the pot and decorative bricks. I simply made a rectangle larger than the fountain basin, then added cross braces to hold the bricks and pot over the water pit.
Set the pump inside the basin and make sure you have a heavy duty outdoor electrical cord to connect the pump to a GFI outdoor electrical outlet. You may need to set the pump up on bricks. If you do not have a GFI outdoor outlet, you either need to have one installed, or use a solar powered pump. You can find such pumps on our water garden page at http://www.thegardenglove.com/water_garden.html. DO NOT connect the pump to an electrical source not rated for the outdoor situation! Always use caution when dealing with electricity.
I bury my electrical cord under the ground in a pvc pipe to protect it from accidents with shovels, lawnmowers and other tools.
Now connect the tubing to the pump, and leave a long section for running through your pot.
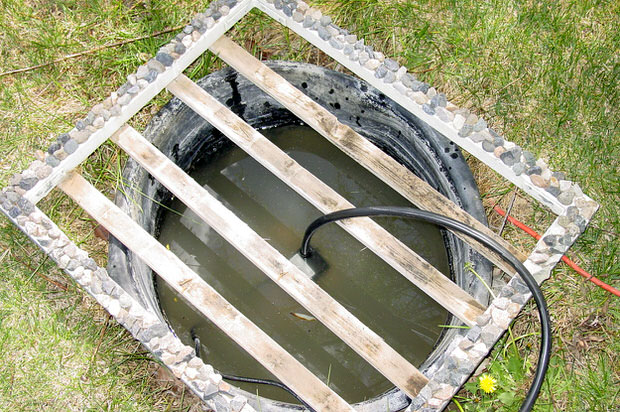
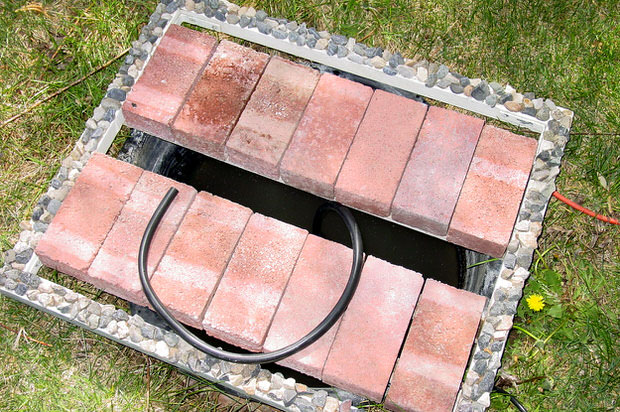
Place the frame over the top of the water basin, with the tubing running up in the middle. I used silicone caulk to add stones to the edges of the frame for a natural look. Now add loose bricks in two rows over the frame, as shown. Place the overturned pot over the center of the frame on the bricks, and run the tubing up through the pot and out through the drainage hole at the top.
Using a ceramic bit, drill a hole large enough for the tubing to pass through in the center of the saucer. Use silicone to glue the saucer on top of the overturned pot as shown, matching up the hole in the pot and the hole in the saucer.
Now thread the tubing all the way up through both holes, ending just inside the saucer. Cut the tubing with scissors if necessary. Fill the basin the rest of the way with water. Never let your pump run dry, it will burn out the motor!
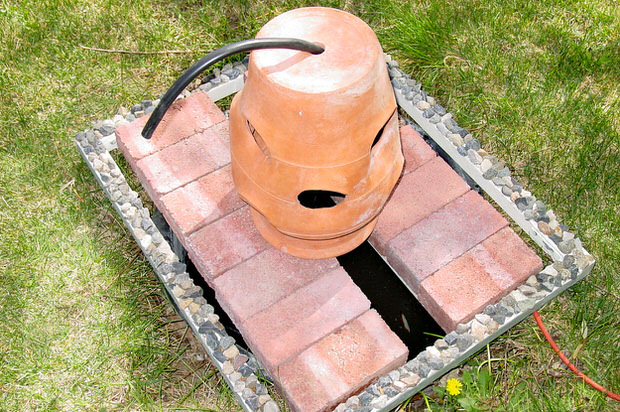
Not watch the saucer fill and splash over the sides, creating a wonderful water sound for your garden, and a gentle rain for the birds! The bricks also offer the birds an area to bathe safely, as they can grip it easily.
I use plants around the edge of the fountain to soften the area and add a natural look. Make sure any plants you use will not block your view of the fountain as they mature! Also choose plants who don’t mind moisture such as pansies, violas, and bee balm.
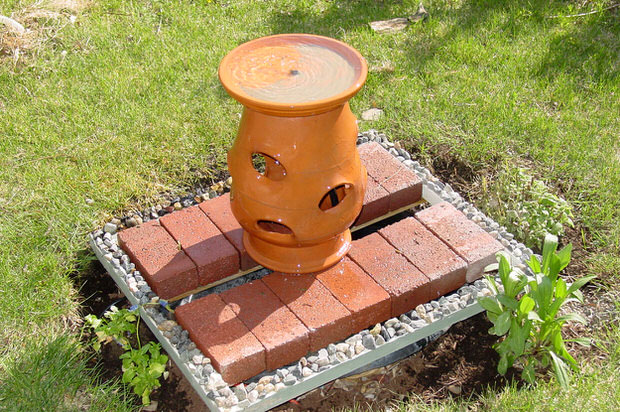
This project can be used with different types of pots as the fountain, as well. Glazed pots are especially beautiful with fountains as the water sparkles off their finish. When making the frame, you could optionally line the frame with hardware cloth, then fill the entire frame with pebbles instead of using the bricks. Make sure you place the pot onto the frame before the pebbles so it will rest securely on the cross braces.
Copyright © www.100flowers.win Botanic Garden All Rights Reserved