

As a founding employee of Gardener's Supply, I wore many different hats over the years. Currently, I have my own company called Johnnie Brook Creative. The gardens around my home in Richmond, VT, include a large vegetable garden, seasonal greenhouse, cutting garden, perennial gardens, rock garden, shade garden, berry plantings, lots of container plants and a meadow garden. There's no place I'd rather be than in the garden.

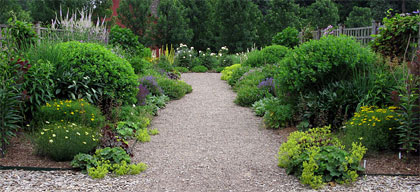
A regular schedule of dividing ensures that a perennial border looks its best.
As spring makes its slow return, perennial gardens begin to stir. The weather is cool and the soil is moist. Emerging plants are slow and sleepy. These early spring days, which usually last only a few weeks, are the best time of year for dividing perennials.
If you have an established perennial garden that’s more than two or three years old, chances are good that you have some plants out there (probably quite a few) that need your attention. The window of activity is small, so there’s no time to waste!
Once your perennials get more than about 3-inches tall and start to leaf out, dividing them becomes a traumatic event (for them if not for you!). You may sacrifice the current year’s blooms — and if you’re not careful, possibly the entire plant. There are a few perennials that will tolerate early summer division (like bearded iris and daylilies) and a few others (see below) that should only be divided in fall. But for the other 90%, now is the time.
Why do perennials need to be divided? There are three main reasons. They may have become too large for the space; the oldest part of the plant may have died out; or growth may have become so dense that the plant is no longer blooming well.
Step 1: Digging up the perennial to be divided. In this example, it's a sedum, which usually requires division every two to three years.
Step 2: Many perennial clumps, such as this one, are so dense that a shovel is necessary to cut through the root mass.
A healthy chunk, ready for replanting.
Here’s how to do it.
1. Unless the plant is quite small, you’ll find it’s easiest to use a garden fork or spade to lift out the entire root ball and place it on a nearby tarp. (It can be helpful to recruit a strong and youthful partner for this part.)
2. Pry the root ball apart into two or more pieces. If the growth is too dense to pull apart, you can cut the root ball into pieces using a sharp spade, hand saw or old serrated kitchen knife. Discard any sections that are dead or have weakened growth.
3. Before replanting, freshen up the soil by incorporating some compost and a handful or two of granular organic fertilizer.
4. Replant only the healthiest chunks, putting the extras elsewhere in the garden or passing them along to friends.
5. Water the newly-divided plants deeply and keep their roots consistently moist for at least 2 weeks, while they are getting re-established.
Copyright © www.100flowers.win Botanic Garden All Rights Reserved