



I've been gardening and writing about gardening for more than 20 years, yet I find I'm always learning new things about the plants, insects and other critters that call my backyard home. That's the great thing about gardening — it's never boring! I've worked as a landscaper, on an organic farm, as a research technician in a plant pathology lab and ran a small cut-flower business, all of which inform my garden writing. A few years ago my husband and I purchased a beautiful old Victorian house and opened a pet-friendly B&B; I've spent the last few summers renovating garden beds and adding new ones. My husband once asked me when I'll be finished, to which I replied, "Never!" For me, gardening is a process, not a goal.
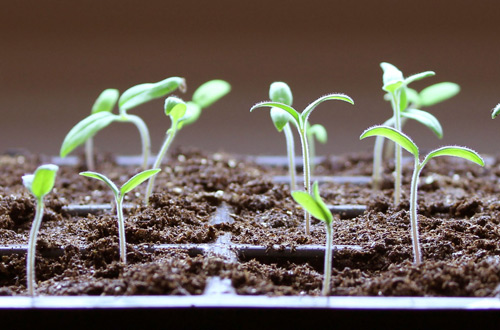
A seed-starting kit, such as the GrowEase Seed Starter Kit, makes it easy to grow vigorous, healthy seedlings.
I’VE talked to so many gardeners who are experienced at growing plants outdoors but hesitate to start seeds indoors. To me, starting seeds is one of the most rewarding parts of gardening. It gets my hands in the soil (or at least the seed-starting mix) during the dark, cold days of late winter and early spring. And it's so amazing and rewarding to plant a seemingly lifeless seed and watch it sprout and grow. Here are answers to some of the hundreds of questions I've been asked about seed starting. When you see how easy it is, I hope you'll give it a try!
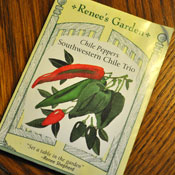
Three for the price of one! This packet contains three varieties of chile peppers.
Gardeners start their own seeds for all sorts of reasons. First of all, if you start your own seeds, you can plant hard-to-find varieties. You'll likely find fewer than a dozen varieties available as plants at your local garden center, but hundreds more are available as seeds.You can save money, too; a packet of seeds costs a few dollars and usually contains a dozen or more seeds — a single plant often costs more than an entire packet. Nurturing a little patch of green indoors is a great way to beat the winter blues, and I think it's particularly rewarding to grow a plant from seed to harvest.
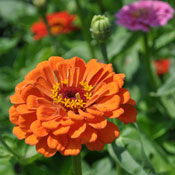
Zinnias are one of the easiest flowers to grow from seed.
If you're new to seed starting, begin with easy, reliable seeds, including tomato, pepper, basil, zinnia, marigold, cosmos. These all germinate readily and grow quickly. Once you've mastered these, you can try your hand at more challenging plants.
Most seed packets include sowing instructions.
When you're starting seeds indoors, timing is everything. The goal is to grow seedlings that are the ideal size for transplanting into the garden at the proper time. Sowing dates depend on:
Most seed packets suggest a planting time, such as "sow seeds indoors six weeks before your average last frost date." To calculate your planting date, start by determining your average last spring frost date, mark it on a calendar, and count back in one-week increments. Learn more: When to Start Your Seeds
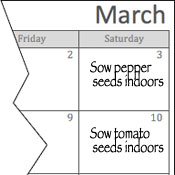
Create a planting calendar by counting back from your last frost date.
The easiest way to find out is to ask a neighbor who's an experienced gardener. You can also contact a local Master Gardener program (part of your state's Cooperative Extension) or ask staff at your local garden center. The date of the actual last spring frost varies from year to year so the "average last spring frost date" is just an approximation, but it gives you a starting point.
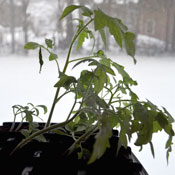
Growing on a windowsill, these sad-looking seedlings are reaching for the light.
Although it's possible to grow seedlings on a sunny windowsill, you'll get much better results if you grow them under lights. That's because the sunlight in early spring isn't nearly as intense as summer sun, and the days are shorter, too. Seedlings growing on a windowsill will reach for the sun, resulting in long, weak stems that bend toward the light. Plants grown under the consistent, bright fluorescent lights of a light garden, on the other hand, will have strong, stocky stems that will adapt better once they're transplanted into the garden. Learn more: Gardening Under Lights
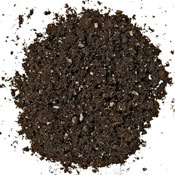
Seed-starting mixes are well-drained and disease-free.
Garden soil tends to drain poorly, especially when it's used in small seed-starting trays. It can also harbor disease organisms that can damage or kill young seedlings. You'll get the best results by starting seeds in a lightweight mix formulated specially for seed starting, such as Germinating Mix. These mixes drain freely yet retain enough water for seedling roots, and they're free of fungi and other disease-causing organisms. Learn more: Choosing the Right Soil for Seed Starting.
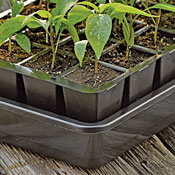
Seed-starting systems are designed for healthy seedling growth.
While you can start seeds in any container that has drainage holes, specially designed seed-starting pots and trays provide optimal conditions. They let you start lots of seeds in a small space, and they drain freely to prevent rot. Some people prefer biodegradable pots, such as Cowpots; others prefer reusable trays. Self-watering, all-in-one seed-starting systems are convenient and foolproof. Learn more: How to Select the Right Seed Starting System
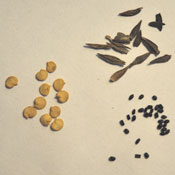
Basil, pepper and zinnia seeds: different sizes, different planting depths.
Most seed packets tell you how deep to plant. A rule of thumb is to sow seeds two or three times as deep as they are wide. Take care not to plant seeds too deep. A seed contains a limited supply of stored food to nourish it during germination. If you plant it too deep, it will run out of food before it reaches the light and grows big enough to start producing its own. Some seeds require light to germinate; the seed packet should say this. Sow these seeds on the surface of the planting mix.
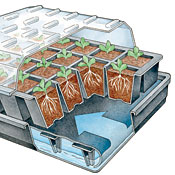
Self-watering seed starters take the guesswork out of watering.
Bottom watering is usually preferable because it keeps the soil surface dryer, helping prevent disease problems. For small seeds or surface-sown seeds, top misting keeps the surface moist for better germination. Self-watering seed-starting systems, such as our GrowEase Seed Starter Kit, use a wicking fabric to supply water from the bottom, providing a steady supply of just the right amount of water to plant roots. You just fill the reservoir and don't need to worry about over- or under-watering.
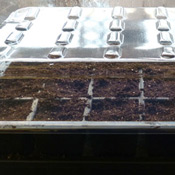
Remove the greenhouse cover as soon as you see the first shoots.
The greenhouse cover holds in moisture, raising the humidity for fast germination. As soon as you see the first tiny sprout, remove the cover. This allows air to circulate around seedlings, minimizing disease problems.
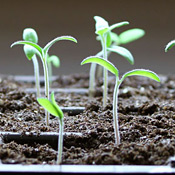
Keep lights 4" to 6" above the seedlings.
Keep the lights a few inches from the tops of the seedlings to promote strong, stocky growth. Our light gardens have adjustable lights that are easy to raise as the seedlings grow.
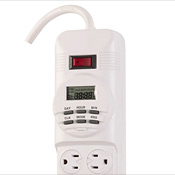
A timer makes it easy to give plants the proper amount of light.
Most seedlings grow best when lights are kept on for about 14 to 16 hours per day. They need a period of darkness (as they would in nature) to rest and prepare for active growth when the lights are back on. An automatic timer makes this easy.
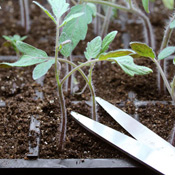
Thin seedlings to one per cell.
A few weeks after seeds start growing, they may start crowding each other. When that happens, it will be time to thin the seedlings. This is the hardest part of seed starting for most gardeners. Choose the strongest seedling and removing the others nearby. This gives the remaining seedling room to grow. Although you can try to separate seedlings and replant, invariably you'll damage some roots, setting back growth. The best way to thin is to snip off extra seedlings at the soil line.
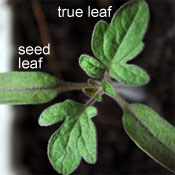
"True leaves" resemble the plant's mature leaves.
The first set of leaf-like structures aren't leaves at all, but are the seed's food storage structures, called cotyledons. The second and subsequent sets are true leaves, and they resemble the mature plant's leaves. Begin fertilizing seedlings when they're an inch or two tall, or when they have their second set of true leaves.
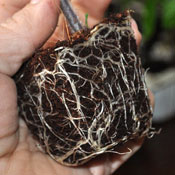
Time to transplant — before the roots get too crowded.
Tomatoes and other fast-growing plants may outgrow their pots before it's time to move them into the garden. About a month after sowing or when seedlings are about 4" tall, gently remove one of the seedlings from its pot. If the roots are beginning to fill the space, then it's time to transplant them into a larger pot. Avoid waiting too long, because root crowding can stunt plant growth and make it difficult for plants to recover after transplanting.
Acclimate seedlings before planting them in the garden.
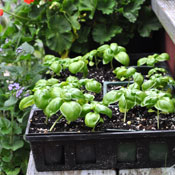
Hardening off is simply acclimating plants to outdoor conditions. Seedlings grown indoors have been coddled — you've been giving them just the right amount of light, moisture and nutrients. Outdoor conditions are more challenging, with fluctuating temperatures and light levels, more variable soil moisture, and wind. About a week before you plan to set the seedlings into the garden, start hardening them off. Place them in a protected spot outdoors (partly shaded, out of the wind) for a few hours, bringing them in at night. Gradually, over the course of a week or 10 days, expose them to more and more sunshine and wind. A cold frame is a great place to harden off plants.
EVEN the most experienced seed starters occasionally have problems. Here are some symptoms, and possible causes.
Poor germination. Although most common vegetables and annual flowers germinate readily, some types of plants have notoriously poor germination rates. Often, this is indicated on the seed packet (with the suggestion to sow extra seed). First of all, be sure you've given plants enough time to germinate. At sowing time, mark the pots with the type of plant, date of sowing, and days to germination (found on the seed packet). Some seeds take two weeks or more to sprout. Poor germination can be caused by overly wet or cold soil, which causes seeds to rot. (The latter can be remedied with a Heat Mat.) If the soil was too dry, the seeds may not have been able to absorb enough moisture to sprout. And if the soil dried out even once after they began growing, the fragile new roots may have died before the shoot even emerged above the soil. Poor germination can also be caused by out-dated seed, and seed that hasn't been properly stored.
Damping off. If, after a few days, some of your seedlings keel over, as though a tiny lumberjack felled them at the soil line, then you're probably seeing the effects of damping off. This is caused by soil-borne fungi attacking the stem. There's no cure, and the seeds won't resprout. Start over with clean containers and sterile seed-starting mix. Allow the soil surface to dry out slightly between waterings, and place a fan in the room for good air circulation. To disinfect used containers, sterilize them in a 10 percent bleach solution (1 part bleach to 9 parts water.) To learn more, read the article Damping Off
Mold and algae growth. If you see fuzzy white growth or slimy green patches on the surface of the planting mix, or on the outside of biodegradable pots, it's probably mold or algae. Although generally harmless to the seedling, they both indicate that the seed-starting mix is too wet. Allow it to dry out slightly between waterings and use a small fan in the room to increase air circulation.
Pale, stretched-out seedlings with weak stems. "Leggy" seedlings are often the result of inadequate light, both in intensity and duration. Place plants under grow lights, arranging them so the lights are a few inches above the tops of the plants, and keep the lights on for about 14 to 16 hours per day. Leggy plants can also result from too-warm room temperatures and overcrowding. Inadequate fertilizing can lead to pale, weak-stemmed plants.
Discolored leaves. If seedling foliage is pale green, yellowish green, or has a purple cast to it, the plants may need a nutrient boost. Begin fertilizing seedlings when they're an inch or two tall, or when they have their second set of true leaves. Use a water-soluble fertilizer that's diluted to half-strength, applying weekly for the first few weeks. After that, you can go up to full strength applied weekly. (Be sure to follow the label directions for dilution rates.)
Copyright © www.100flowers.win Botanic Garden All Rights Reserved