


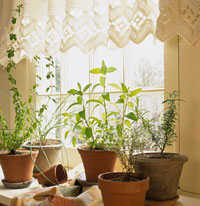
An indoor herb garden delivers fresh, flavorful ingredients for cold‑weather cooking at almost no cost, while adding a lively, green touch to your kitchen.
Place containers at the sunniest window—south or southwest exposure is ideal. Position the most light‑hungry herbs (oregano tops the list) in the center, with less demanding varieties toward the edges. Even with a bright window, a grow light dramatically improves results and is often included in indoor herb kits.
No outdoor garden? No problem. Late fall is still a great time to begin. Garden centers often discount remaining herbs, and mail‑order nurseries can ship selections quickly—just confirm they’ll hold shipment during extreme cold snaps.

Stick with these reliable performers: oregano, chives, mint, rosemary, and thyme. They’re kitchen staples and actually survive winter indoors. With luck, you can harden them off and move them outside in spring.
Caution: Not every culinary herb thrives inside. Basil, for instance, often declines after a few weeks indoors.
Use 4‑inch pots that fit your windowsill. Drainage holes are non‑negotiable—without them, roots rot. Saucers should be slightly wider than the pots (so a 5‑inch sill is the minimum). Terra‑cotta looks great but dries fast in heated homes and can leak; line saucers with plastic or rubber pads.
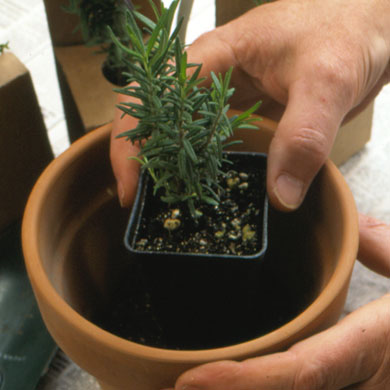
Step 1: Cover the drainage hole with a square of window screening. Fill the bottom third of the pot with potting soil. Use the nursery pot (plant still inside) to gauge soil level.
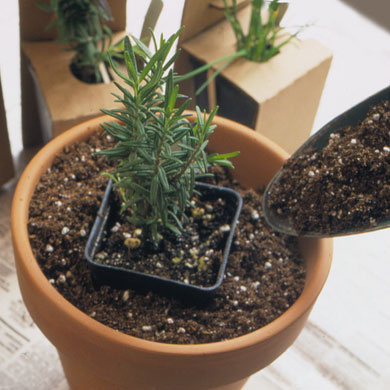
Step 2: Place the herb—still in its nursery pot—into the windowsill pot. Fill around it with potting soil. You now have a pot within a pot.

Step 3: Firm the soil between the two rims with a dowel or fingertips. Add more soil as needed. Do not press down the soil inside the nursery pot.
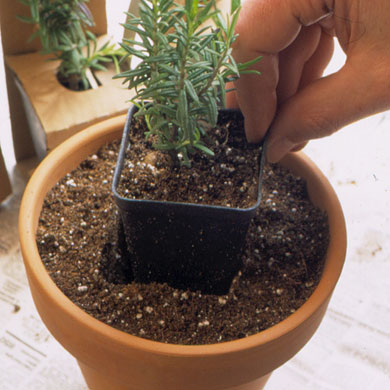
Step 4: Carefully lift out the nursery pot and plant. A perfectly shaped planting hole remains in the terra‑cotta pot.
Step 5: Remove the herb from its nursery pot and set it into the hole. It fits perfectly. Water thoroughly and start growing.
Instead of digging up whole plants (too large for windowsills), take divisions or rooted runners. Chives and mint divide easily; others may need more effort. Since these are essentially free plants, treat it as an experiment—if they don’t make it, you’ve still enjoyed out‑of‑season fresh herbs.
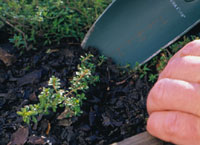
Step 1: Look for new growth. For herbs like golden thyme, insert a trowel sharply behind newly formed roots of an advancing stem to separate a division.
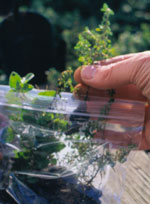
Step 2: Place the division with its root ball in a plastic bag for transport to your potting area.

Step 3: Pot it up, water well, and get your scissors ready for harvesting.
General Indoor Herb Winter Growing: Light, Harvest Timing, Rosemary Turgidity
Growing a Successful Herb Garden: Site Selection, Care, and Variety Guide
Herb Gardening 101: Grow Your Own Medicine, Flavor & Beauty
Four Compelling Reasons to Grow an Indoor Herb Garden
Perennial Herbs for Your Garden: Plant Once, Harvest for Years
Herb Gardening in the Pacific Northwest: Selection and Resources
Dried Herb Shelf Life and Sourcing: Beyond eBay
Growing Vegetables Indoors Over Winter: What Works and What Doesn't
Grow Basil Indoors: Fresh Flavor Year-Round
Growing Herbs Indoors: A Beginner's Gateway to Gardening Success
Make Your Own Herb Vinegars: Simple, Flavorful, Beautiful
Growing Herbs Indoors: Light Solutions for Low-Light Windows
Copyright © www.100flowers.win Botanic Garden All Rights Reserved