


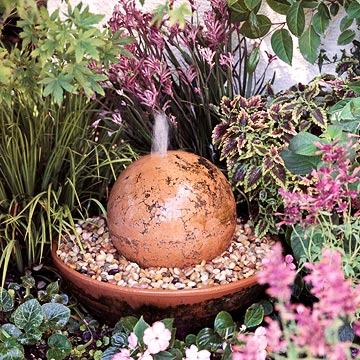
Nothing soothes the senses in the garden quite like the sound of flowing water. You don't have to buy an expensive fountain to savor its relaxing melody. You can create your own natural-looking water feature using inexpensive materials.
This inviting terra-cotta fountain is so easy to make that even a youngster can craft it. San Diego's Jeff Wurzbach, now 17, designed and built the fountain when he was just 13 years old. Jeff, who has had a wealth of creativity and a proficiency with power tools since an early age, chose terra-cotta as his medium because he considers it easier to work with than stone.
He recently re-created the assembly process for Garden Ideas & Outdoor Living® and offers these simple step-by-step instructions.
Accent your table with a homemade fountain.
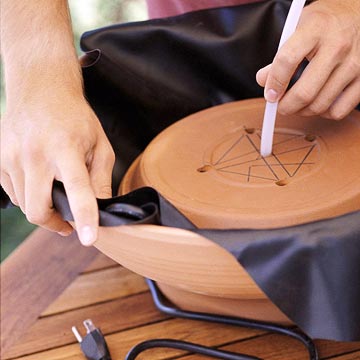
Step 1. Using the string, measure the distance from the top edge of the terra-cotta bowl across the bottom to the top of the other side, allowing the string to conform to the shape of the bowl. Then cut a piece of pond liner to a diameter slightly larger than that measurement. Place the liner in the bowl. It should be slightly higher than the top. Avoid trimming the excess until the fountain is assembled because gravel and water will pull the liner down.
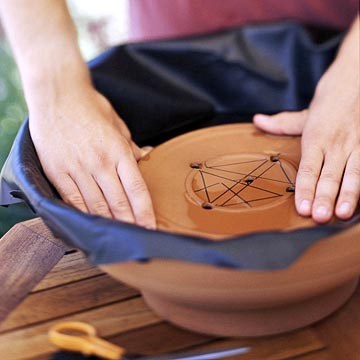
Step 2. Set the saucer upside down on the liner in the bottom of the terra-cotta bowl. Make sure the pump will fit under the saucer with the liner in place. Once you're satisfied with the height, remove the saucer and drill several holes in the bottom to allow for good drainage. Drill one hole in the center large enough to accommodate the plastic tubing and one on the edge to allow clearance for the pump cord.
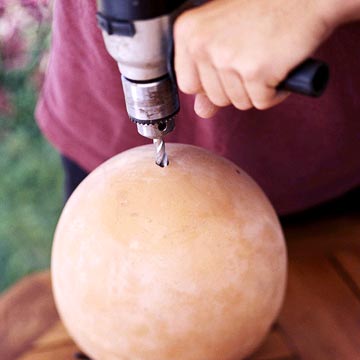
Step 3. Using a drill bit slightly larger than the diameter of the plastic tubing, carefully drill a hole in the top center of the terra-cotta sphere. Wear goggles for protection when using the drill, as small terra-cotta chips tend to fly when the drill is operating.

Step 4. Push one end of the tubing through the hole in the top of the sphere. Place the saucer upside down, then feed the other end of the tubing down through the hole in the center of the saucer, being careful not to pull it loose from the sphere.

Step 5. Center the sphere on the upside-down saucer. Connect the tubing coming from the saucer to the pump outlet and set everything back into the bowl. Gently tug on the tubing so it runs straight up from the pump, through the saucer, and out the top of the sphere. Check the pump by filling the bowl with water and plugging in the unit. If everything works, trim the end of the plastic tubing flush with the bowl.
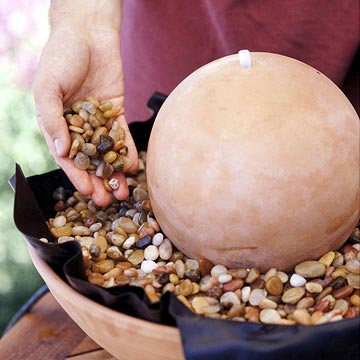
Step 6. Wash pebbles in a bucket of water to remove silt and grit, which can clog the pump. Fill the bowl with pebbles. Check the liner again and make sure it is evenly distributed throughout the bowl. There should be no low spots in any of the folds. Trim any excess to the top of the sphere. With use, the sphere will develop moss and take on a weathered look.
Copyright © www.100flowers.win Botanic Garden All Rights Reserved