

Unlike the bigger jobs of pouring a patio or building a driveway, you needn't move a lot of earth or prepare extensive footings to build this type of walkway. You can work at your own pace, completing several sections one weekend, more the next.
Masonry dealers offer a variety of aggregates that vary by region. We used pea gravel uniform in size, but you might prefer the look of river pebbles, granite chips, or another option. As with any concrete project, timing plays a critical role in the outcome of an exposed-aggregate finish. Don't try to scrape away the concrete until the aggregate holds firm. If weather conditions are right, this stage should occur in about 1-1/2 hours, but it could take up to 6 hours. To test, lay a board on the surface and kneel on the board; if the board leaves marks, allow more time. If any aggregate dislodges when you start brushing, stop and let the concrete set some more. Finally slow curing is what gives concrete its strength, so wait a week or so before walking on it. Also, dampen the concrete daily as it cures.
continue reading below Step 1
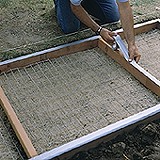
1. Form and pour steps. Excavate, build 2x4 forms, pour sand, and lay wire reinforcing mesh. If you plan to leave the forms as decorative dividers, apply sealer, then cover them with duct tape so they won't be damaged during the pour. Pour concrete with aggregate mixed into it in only a few form frames at a time. Strike off the concrete.
 Step 2
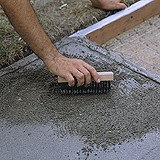
2. Brush to expose aggregate. After the concrete firms up, scrape with a brush or broom to expose aggregate. Spray water over surface; brush again. Repeat spraying and brushing until exposure is uniform and water runs clear.
 Steps 3 & 4
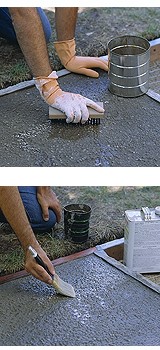
3. Use acid if needed. If a module hardens too quickly, scrub concrete from aggregate with a 1:10 solution of muriatic acid and water. Wear goggles and other protective clothing. Once aggregate is sufficiently exposed, rinse well with water.
4. Finish. To give the surface a lacquerlike sheen and protect the walk from rain damage, wait at least a week for the concrete to thoroughly cure, then brush on waterproofing solution. Remove tape strips from the decorative forms.
Copyright © www.100flowers.win Botanic Garden All Rights Reserved