


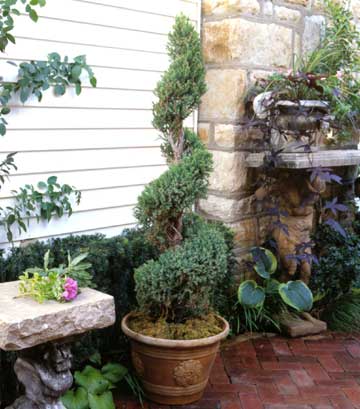
 For a fraction of what a garden shop charges, you can create a spiral topiary at home in an hour or two.
These days, most potted concoctions labeled "topiary" are a far cry from the real thing. Dried moss glued to foam balls is to real topiary what a stuffed toy is to a flesh-and-bone tiger. True topiary is a living ornament made from live shrubs and trees that are snipped and clipped into a wide variety of shapes, including pyramids, spirals, pom-poms, or even animals.
Fortunately, tackling true topiary on your own is easy, as long as you know the basics. And it costs relatively little. Purchase a 6-foot topiary spiral tree like the one shown and you can expect to pay about $250. But shape one yourself -- it takes only an hour or two -- and it'll cost about $50. Read on to learn how.
Do you need to move a tree? Learn how.
continue reading belowSpiral topiaries can be large (6 feet or more) or small (just 8 x 10 inches). If you're nervous about cutting into a large, pricey plant, create a smaller topiary first. Gain confidence by observing similar topiaries at local garden centers or public gardens.
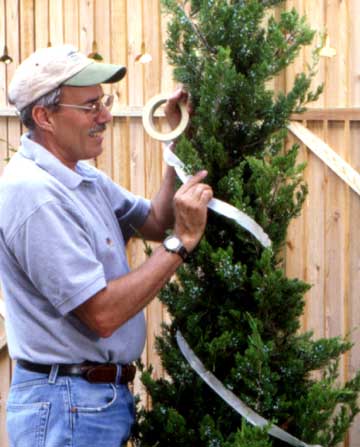 Photo 1
Choose a pyramidal evergreen, such as a juniper, columnar blue spruce, columnar pine, Norway spruce, dwarf Alberta spruce, upright yew (such as "Hicksii"), or boxwood with a straight trunk. With masking tape, map out where to make cuts, starting at the top and working down (see Photo 1). The number of times the spiral goes around the tree depends on the plant and your taste, but most plants look best with three to five revolutions. As you tape, really look at the plant to see how it grows, positioning the tape to work with peculiarly shaped branches. Periodically walk around or turn the plant to view it from all sides and visualize where to make key cuts.
This is perhaps the most important step. Remember: Once a cut is made, you cannot reverse it, you can only work around it.
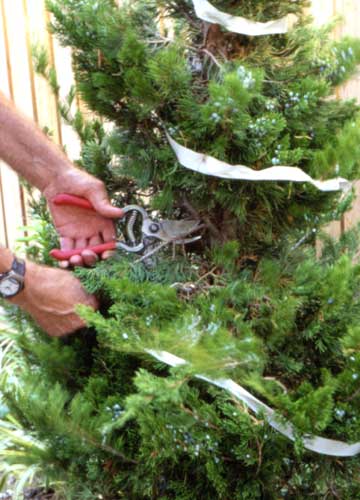 Photo 2
With a sharp pair of hand pruning shears, start clipping the plant, using the taped areas as a guide. We suggest starting in the middle of the plant and working your way either up or down (see Photo 2). Proceed slowly and step back frequently to view your work.
Don't be worried when you see small bare areas near the trunk where the plant has stretched its needles or leaves to reach the sun. It will tend to look crude at this point but begin to look better over time.
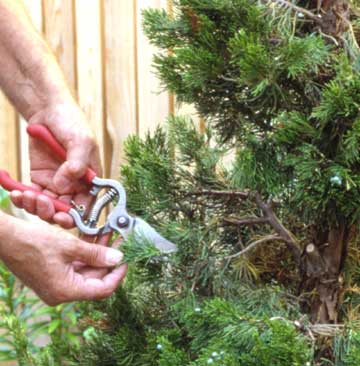 Photo 3
After roughing out the spiral, remove the tape and start refining and defining the remaining greenery, shaping it with your hand shears so it forms a rounded shape around the trunk (see Photo 3).
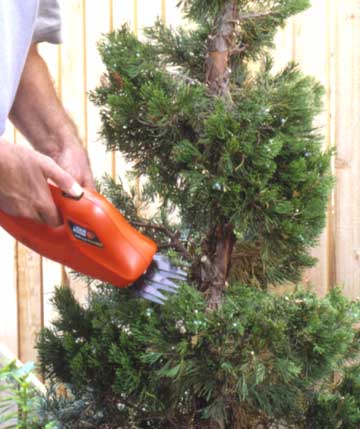 Photo 4
To finish up the shaping, we suggest you use small battery-powered shears, which work well on fine material (see Photo 4).
Give the greenery the lightest shaping possible. Most evergreens tend to grow their needles on the outside of the plant. Cutting too far in will remove greenery permanently, leaving unattractive stumps.
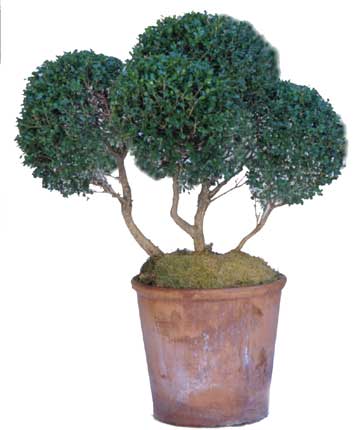 Photo 5
Plant the tree or shrub in its permanent location, either directly in the ground or in a large pot (see Photo 5). Potted plants can grow all year long in Zones 8 and warmer, where winters seldom dip below 20 degrees. Otherwise, store the topiary in a very cool garage or shed during the winter. The storage area should not get below freezing very often and seldom get above 45 degrees. If it's too cold, the roots will freeze, and if it's too warm, the plant will come out of dormancy, becoming spindly.
Keep the plant well-watered all year long, even if it's in a garage. In early spring, you can move it outside to a protected place (it shouldn't receive full sun or exposure to high winds).
During the growing season, the topiary will need pruning about once a month. Regular trimming is important for a couple of reasons: First, if the plant grows too much away from its basic shape, the core will become shaded and die out. Second, pruning encourages the shape to become fuller and bushier, making it even more attractive in years to come.
Copyright © www.100flowers.win Botanic Garden All Rights Reserved