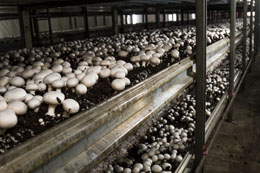
Mushroom compost is a by-product of mushroom farming and is used for soil conditioning. If you are interested in making it all by yourself, this write-up will definitely help you out.

Growing mushrooms is not a difficult task. All you need is a nutrient-rich compost to grow them. Mushroom compost is a result of decomposition caused by microorganisms. Microbes survive and multiply in organic matter rich in carbohydrates and proteins. Water is also an essential requirement for the growth of microbes but only in adequate amount. Excess water creates an anaerobic state which hampers the growth of microorganisms. Hence, it is important to use optimum amounts of these substances to produce nutrient-rich mushroom compost.
Making mushroom compost is a fairly easy task. All you need is adequate amounts of carbohydrates to provide energy to microorganisms, nitrogen for protein supply, air, and moisture to aid in their growth and multiplication.
Preparing Mushroom Compost
Ingredients Required
- Molasses - 1 gallon
- Cottonseed meal - 50 pounds
- Wheat straw - 4 bales
- Horse manure - 100 pounds
- Cow manure - 50 pounds
- Chicken manure - 10 pounds
- Blood meal - 1 pound
- Compost activator - 1 gallon
- Calcium carbonate - 10 pounds
- Super phosphate - 1 pound
- Gypsum - 1 pound
Method
- Place wheat straw in water and leave it for around 3 days. It will absorb water, and this will help in multiplication of microbes. Do not let wheat straw dry out because drying kills microbes which will ultimately destroy your compost.
- Remove excess water from wheat straw and place it in a large bin which can provide a dark environment for microbes.
- Mix all the ingredients together except gypsum, and make sure there is sufficient moisture content in the mix. This does not mean keeping the mix soaked in water because that would ruin the mixture completely.
- Mix the ingredients in such a way that you make a pile. The motive behind this is to generate a lot of heat within the pile, which is obviously not possible by spreading it.
- The pile should be loose enough to have air pockets. It should have a wide base with a tapering top, and measure between 3-5 feet in length and breadth.
- Let the pile of compost mixture stand for 6-7 days. Identification of curing can be done by simply checking the temperature at the center of the pile. If the temperature is between 150-180ºF, rest assured that the process of curing is going on well.
- The temperature within the pile reduces after some days. Check for it and re-mix the pile to generate heat. You can also add some water if the compost has insufficient moisture. Stack the pile again and leave it for further curing.
- If you find development of white fungus at the center of the pile, be happy that your pile is attaining required temperatures for composting. This fungus is called Actinomycetes and is found growing only at high temperatures.
- After about a week, add gypsum to the pile and mix the compost properly with the white fungus spread evenly in the pile. Add water in sufficient quantity to make up for lost moisture. Leave the pile for 5 more days, before mixing it up again.
- The next mix will give you a small pile because the mass of the mix reduces due to composting.
- The final mixture will be blackish brown in color with white fungus all over, having a pH between 7.0-7.5 and an earthly smell.
- The last step involves pasteurizing the compost at 140ºF for 4 hours in an oven. Place a lid over it to retain the moisture and let it cool with the lid on. Remove the lid only when you are ready to add the mushroom culture in it.
Preparing mushroom compost is not tiring except that it is a lengthy procedure, and you need to wait several days before using it for mushroom farming. If you are someone who wants to start with farming straight away, readily available mushroom compost in the market will make your job easy. So whenever you want to grow mushrooms at home, take the first step of preparing a nutritious compost to harvest them and enjoy the delicacies!


 Growing mushrooms is not a difficult task. All you need is a nutrient-rich compost to grow them. Mushroom compost is a result of decomposition caused by microorganisms. Microbes survive and multiply in organic matter rich in carbohydrates and proteins. Water is also an essential requirement for the growth of microbes but only in adequate amount. Excess water creates an anaerobic state which hampers the growth of microorganisms. Hence, it is important to use optimum amounts of these substances to produce nutrient-rich mushroom compost.