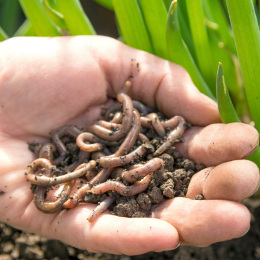
Vermicomposting is the best way to decompose your home garbage into organic manure. Earthworms eat organic kitchen waste and create compost. Read on to get a brief idea on vermicomposting and the methods of raising earthworms.

Vermicomposting is a great way to convert your organic kitchen waste and paper scraps into compost. It is an easy process and does not require much maintenance. You can use a bin or box for a worm bin. The earthworms and decomposing organic waste can be contained in one area. Earthworms require minimum care, attention, and time.
Preparing the Worm Farm
You can use 3 dark-colored plastic bins, containers, or boxes of the same size. At least one of the containers should have a lid to cover the top. Drill many 1/4 inch holes in the bottom of all the bins except one. The bins should look like a grid after drilling. The holes should be at least 1 inch apart from each other.
Additional holes should be drilled 1-inch below the top. Each hole should be 2 inches apart. These holes help in ventilation. The bin with holes should be seated inside the bin without holes. This bin without holes will hold the worm tea that may ooze out of your worm farm.
Take shredded paper, cardboard, and dried leaves, and wet them in water. Use this as a bedding for your worms. This bedding should be about 4 inches deep. Keep the bedding soaking wet but not dripping wet.
Food for your Earthworms
Now, add food for your worms. You can add fruits and vegetable peels, bread, leftover coffee, tea grounds, dried egg-shell, left over meals, pasta, etc. Do not put meat, eggs, cheese, or oil in the bin. Too much citrus or acidic food is harmful for the worms. The temperature for the worm farm should be 65-80 degrees F. Do not place the bin in direct sunlight.
Add worms on top of the bedding. They will burrow through and find their meal. Keep a check on your worms once a week. Once the food you have placed is eaten, add another handful. Be careful, do not overfeed your worms. Cover the bin as earthworms love darkness. The worms gorge down on the bedding and food, leaving behind their castings. This casting can be used as organic compost for your flower garden.
Follow-up for the Worm Farm
You will need to sprinkle water over the bedding daily. Do not over spray water as it can be harmful. A dry bedding is not suitable for the growth of worms. Earthworms multiply fast if they are given suitable conditions. They are hermaphrodites and breed every three months. When the bedding level goes down, simply add more of it from the top.
You will need to change the compost bin after a month. You will have to drill holes as you did for your first bin. The bin should be filled with bedding and food. Add the worms from the old bin into the new bin. To do this, place the new bin over the old bin and make sure that the bottom touches the bedding in the old bin. The worms will crawl over the top through the holes into the new bin in search of food. You can then remove the older bin and place the new bin directly in the bin without holes. Scrap out the compost and castings in the older bin and add it to your plants or garden soil. Wash the bin properly and re-use it in the next month.
It is a worthwhile experience having your own vermicomposting unit. Earthworms make great pets as they require minimum care and in turn provide you with rich organic manure. You can dig through the bedding and see baby worms wriggling in the bin. It's a great way for children to learn the morphology of worms and it can also be a great science project! If you love fishing, you have your own worms to use as a bait. Your earthworms will flourish without much care. 'Happy vermicomposting!'


 Vermicomposting is a great way to convert your organic kitchen waste and paper scraps into compost. It is an easy process and does not require much maintenance. You can use a bin or box for a worm bin. The earthworms and decomposing organic waste can be contained in one area. Earthworms require minimum care, attention, and time.